
1. Login
1.1. Introduction
This document aims to explain how to go through the first-time login after creating an organization.
1.2. First-time login
- When logging in for the first time, the user must log in with the following user name and password.
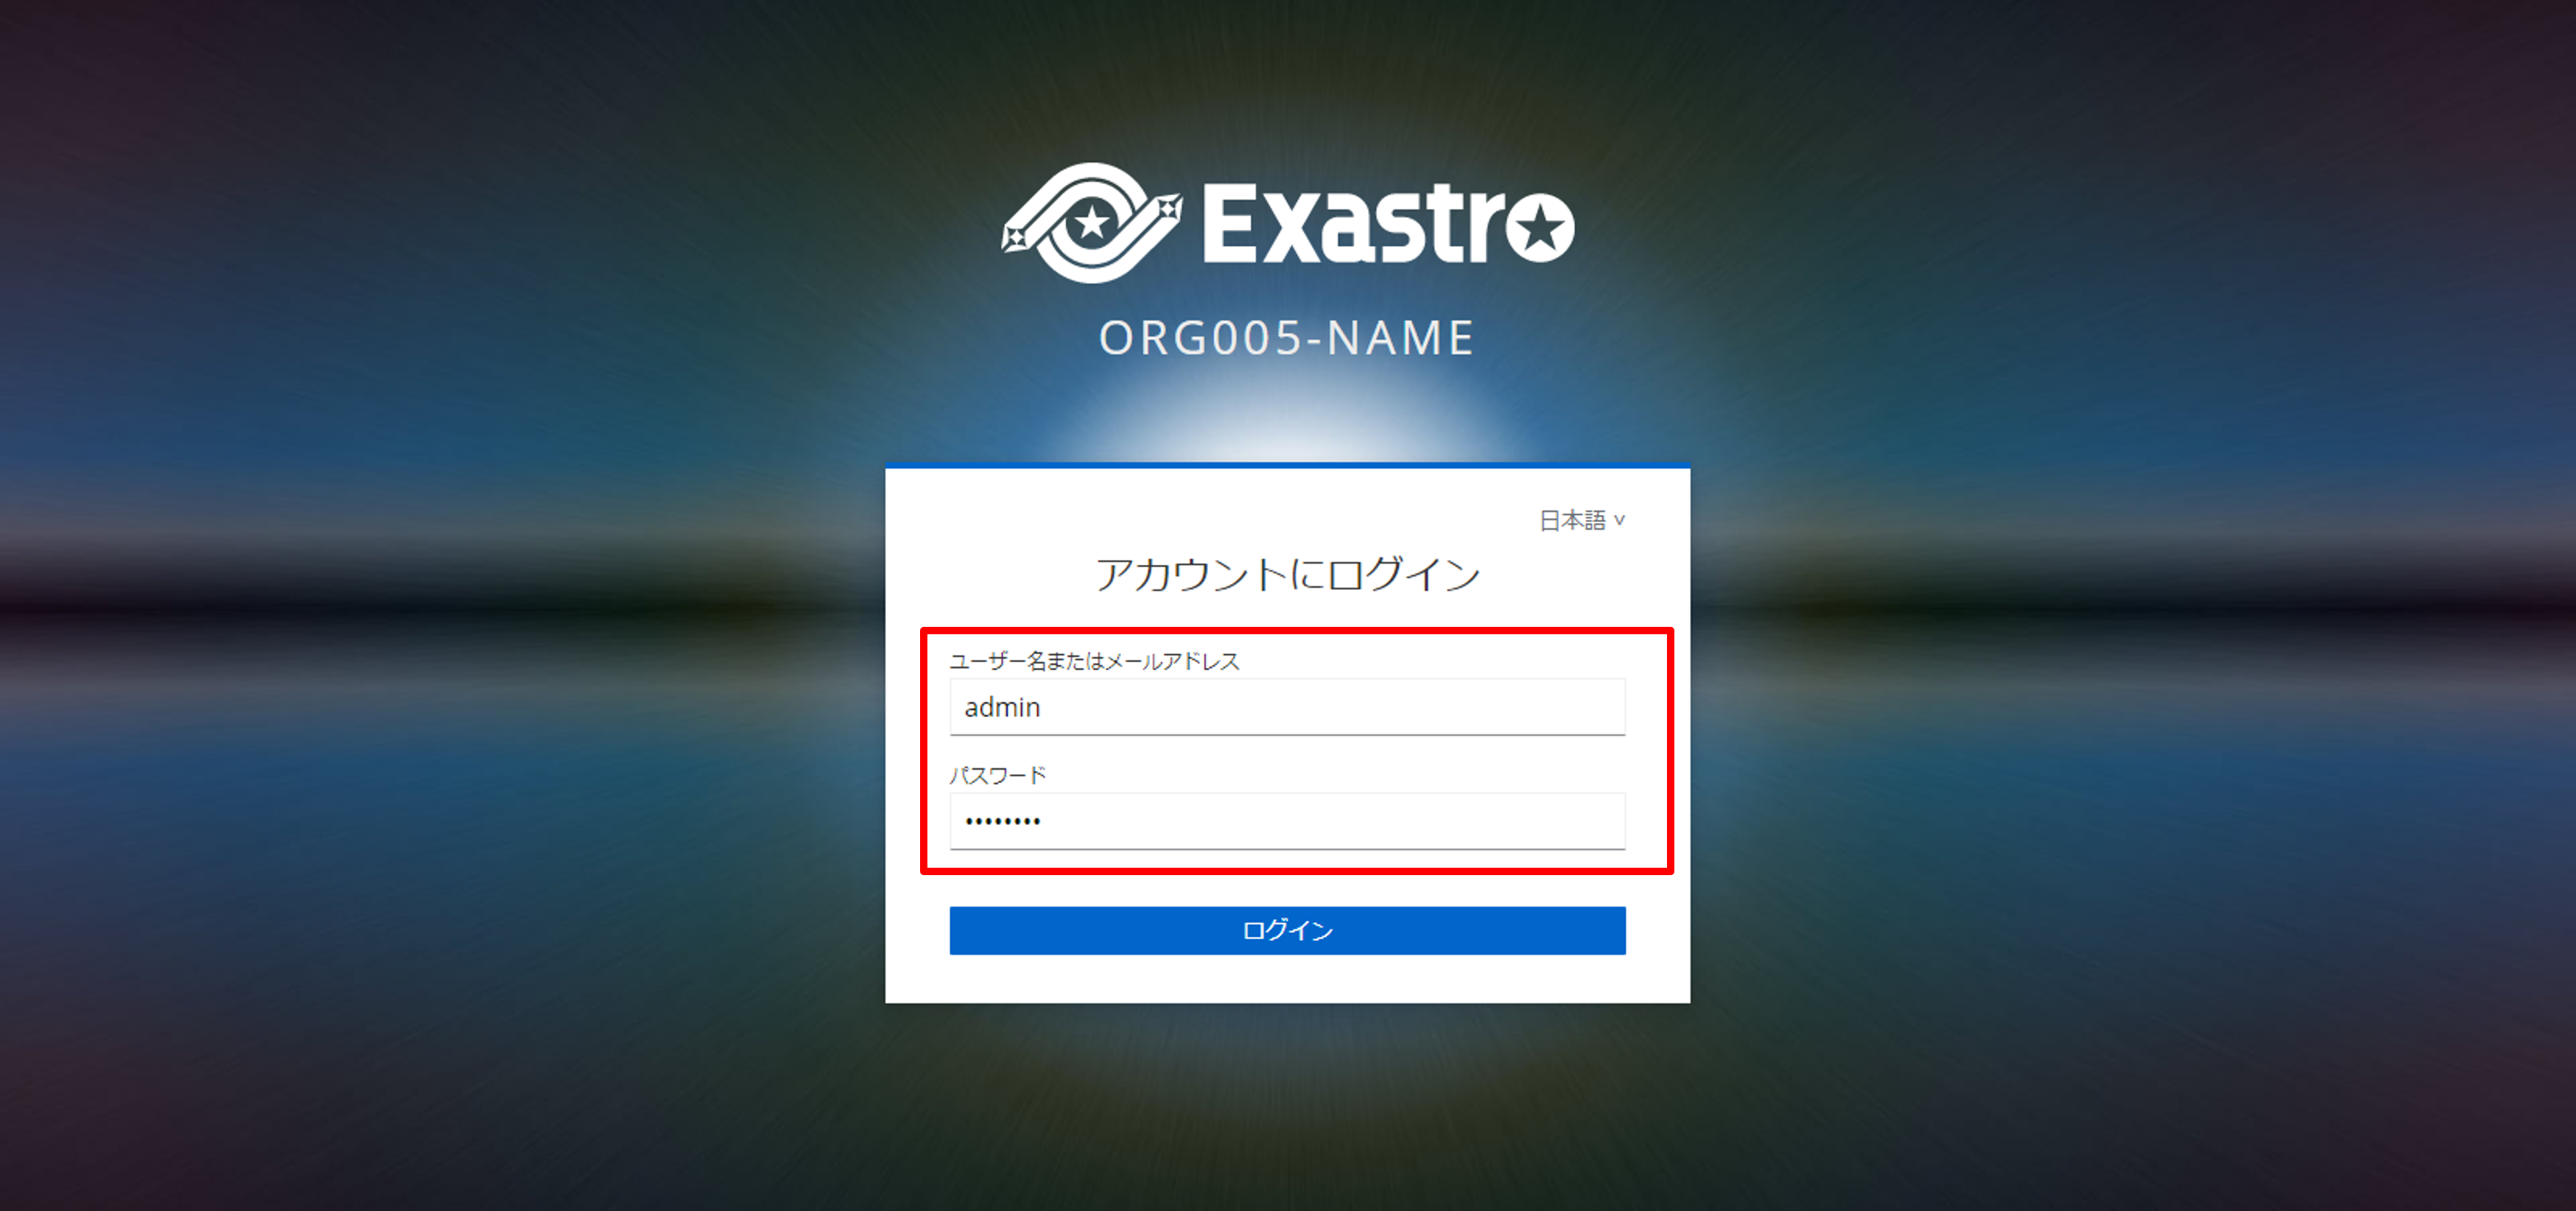
表 1.76 Item description¶ Item name
Description
User name or mail addressThe user name or E-mail address specified by the administrator.e.g. "user" or "user@example.com" ※PasswordThe password specified by the administrator.e.g. password ※Tip
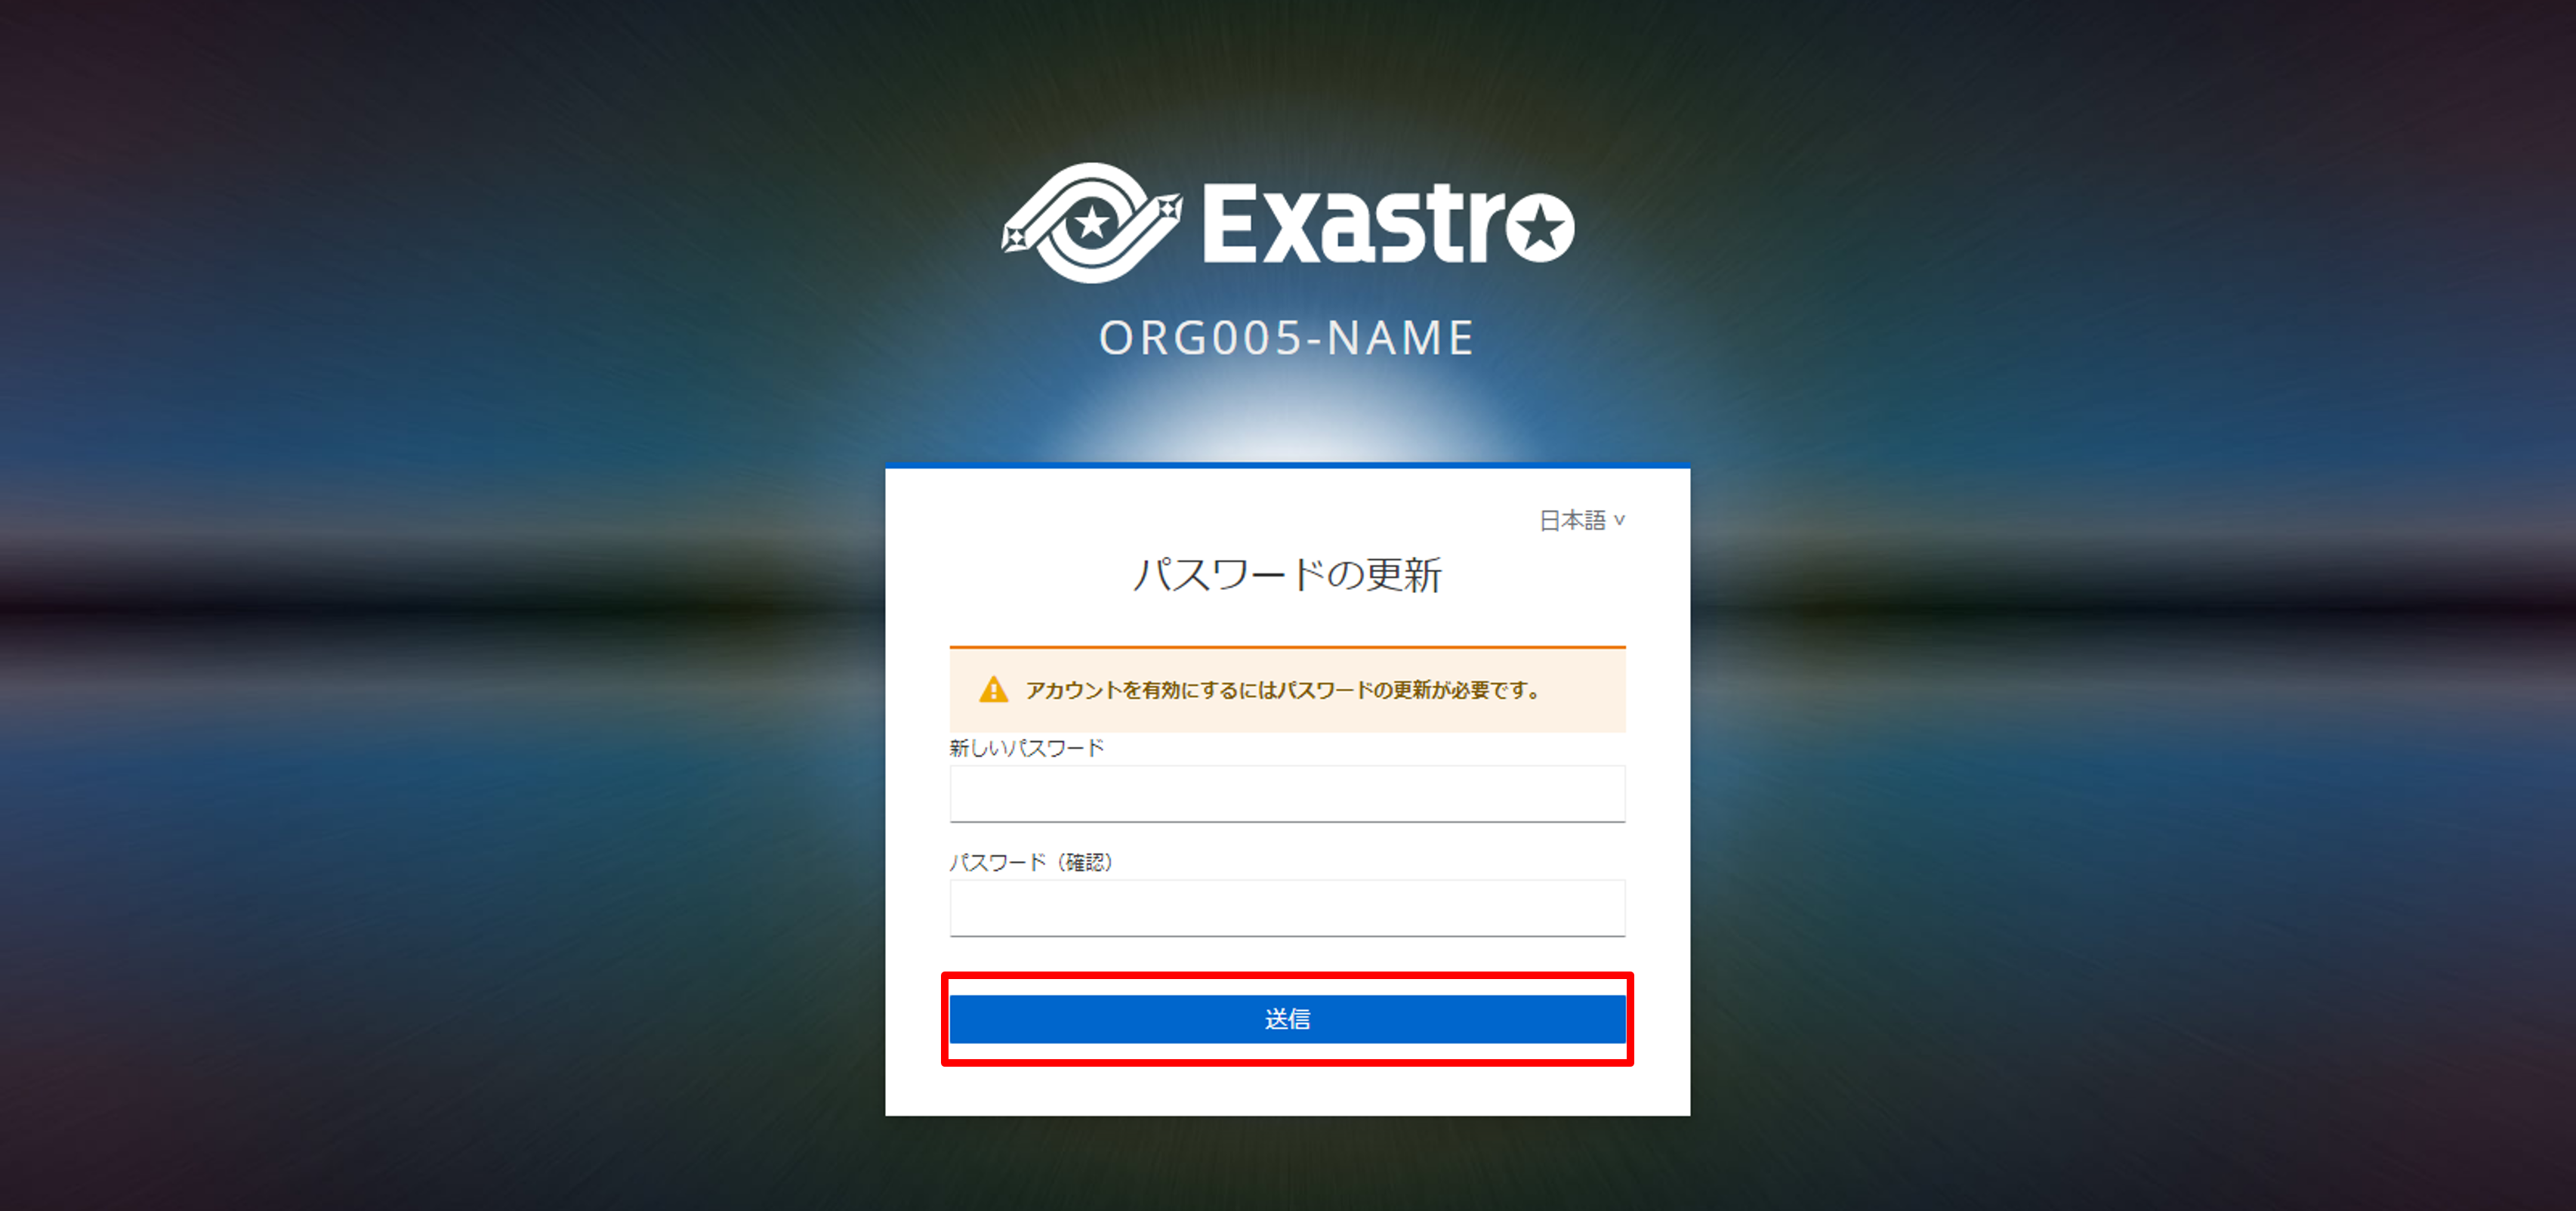
※When logging in for the first time, make sure to use the Admin login ID(User name or E-mail address) specified in Create Organization. - Update the password and press the "Send button.
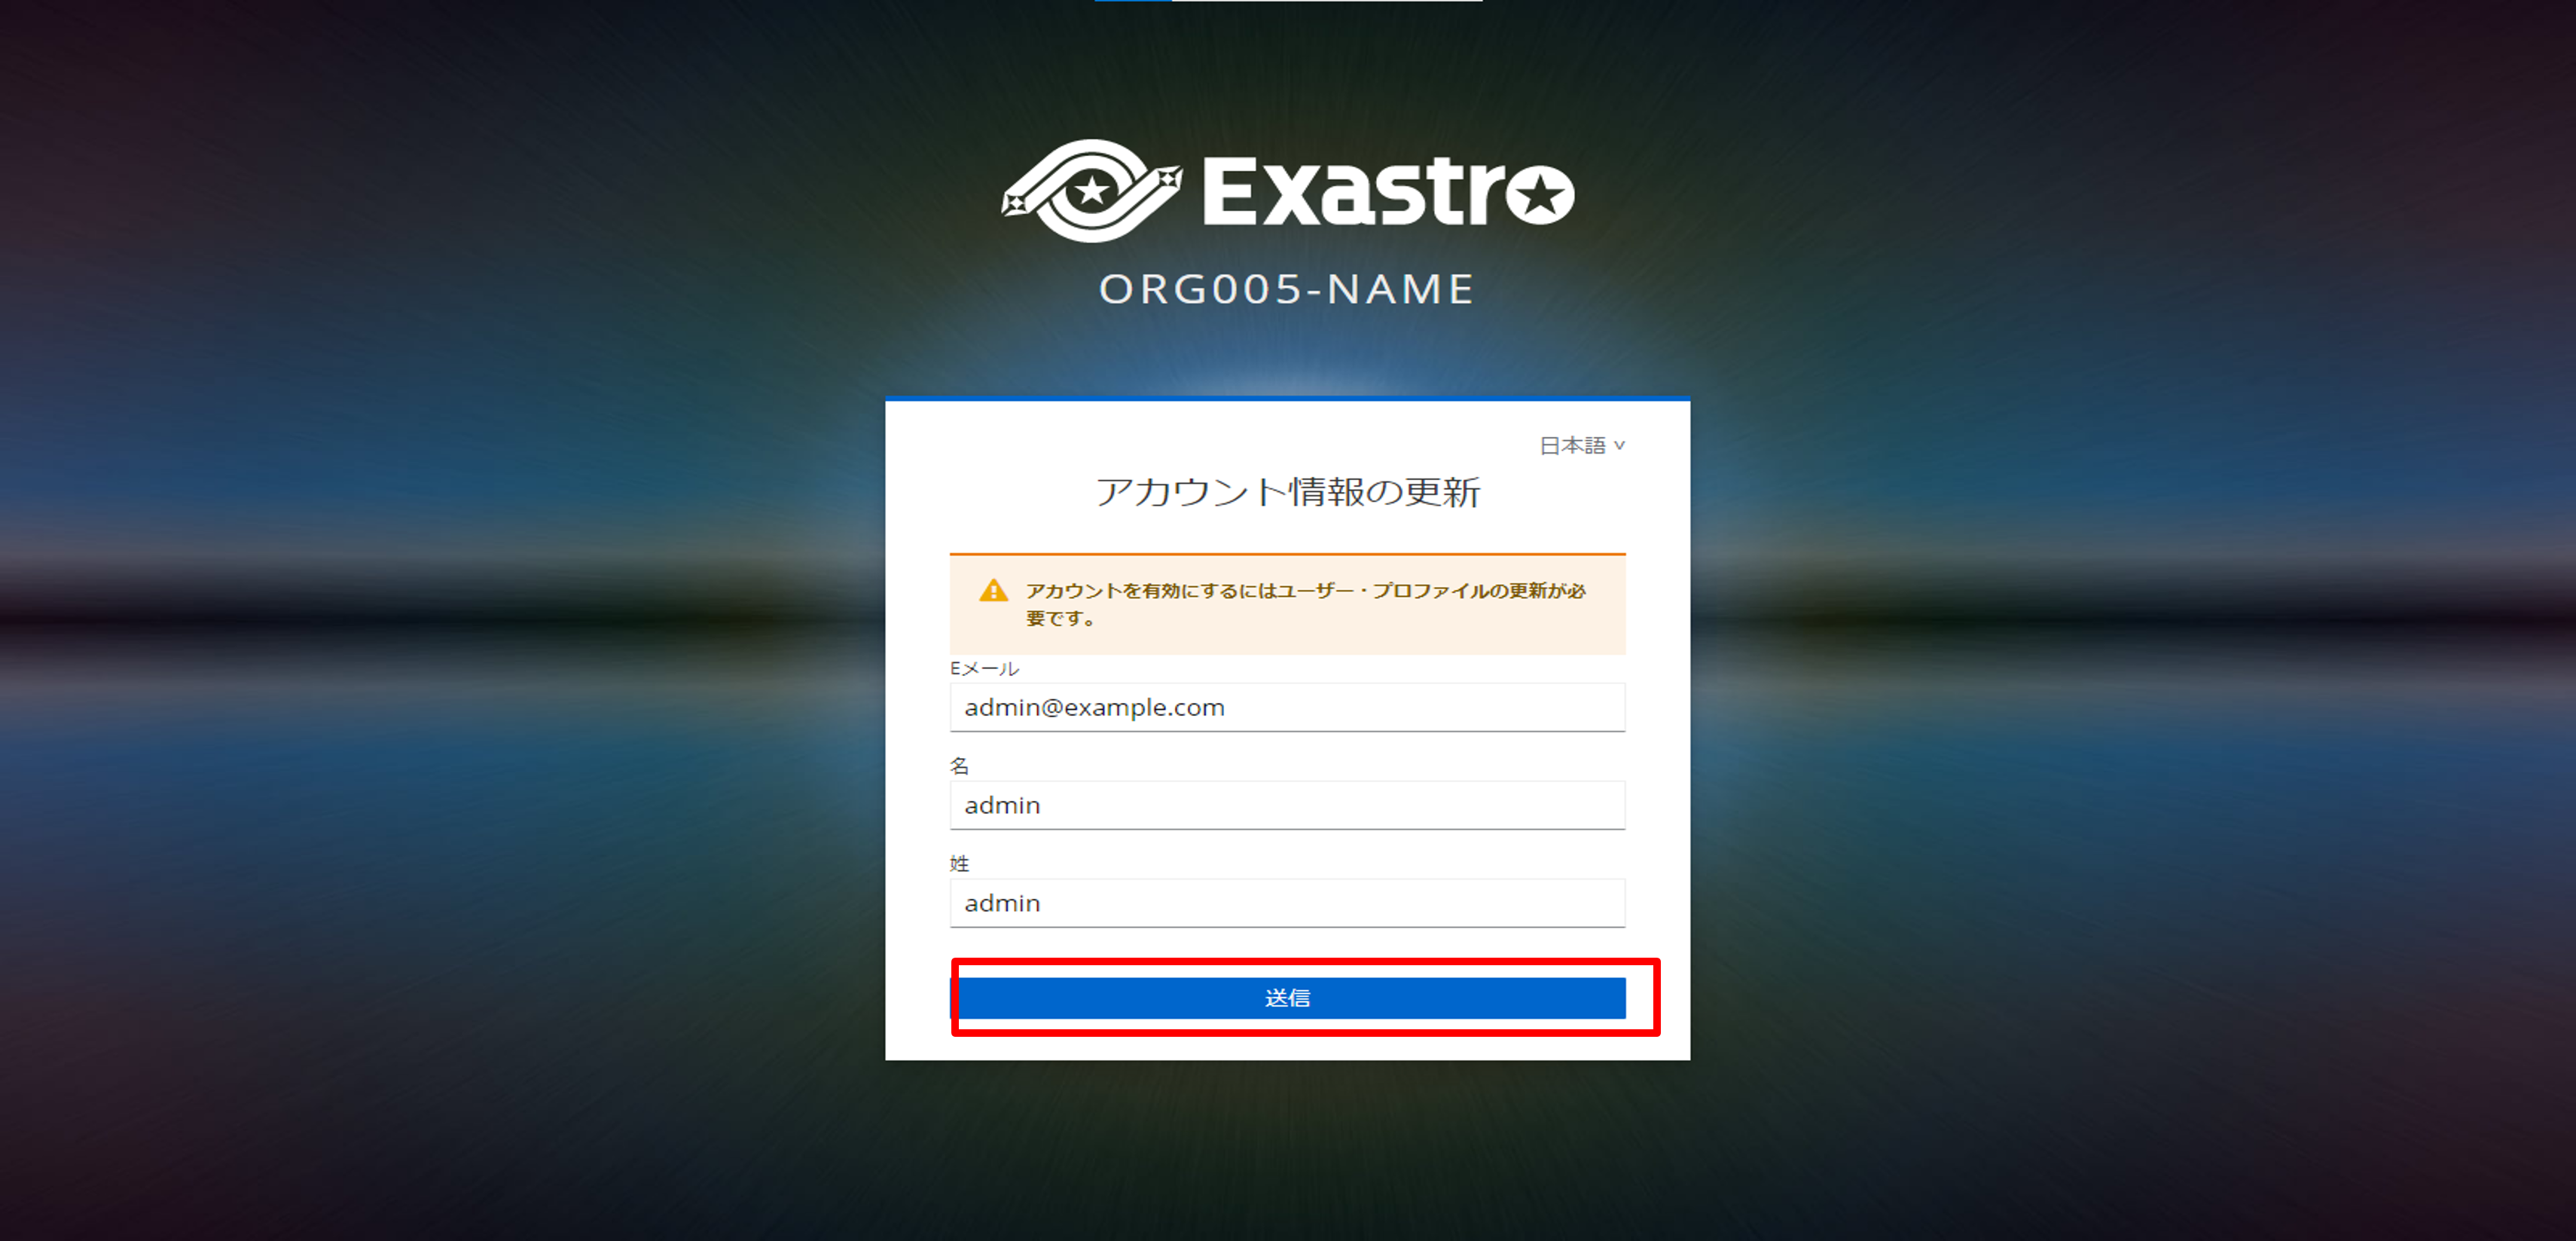
- Update the account information and press the Update button.
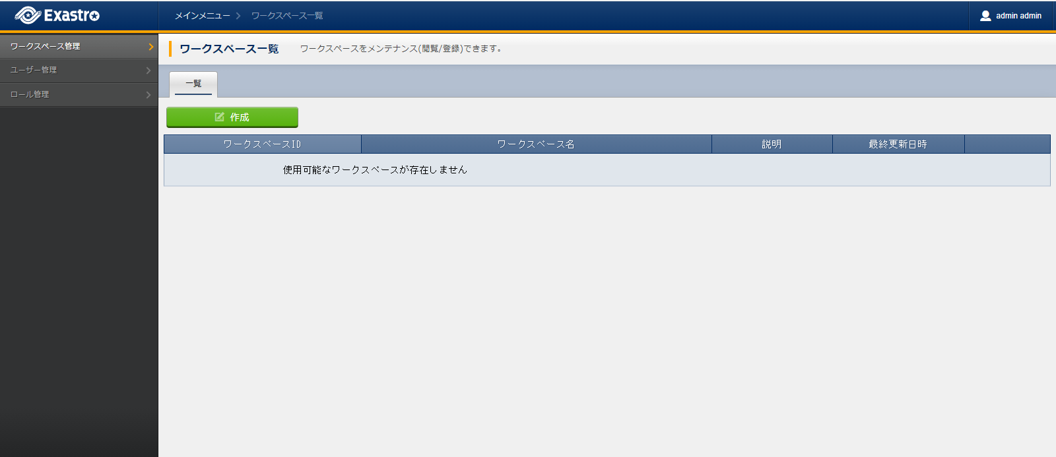
- The Workspace management page similar to the picture below will be displayed.
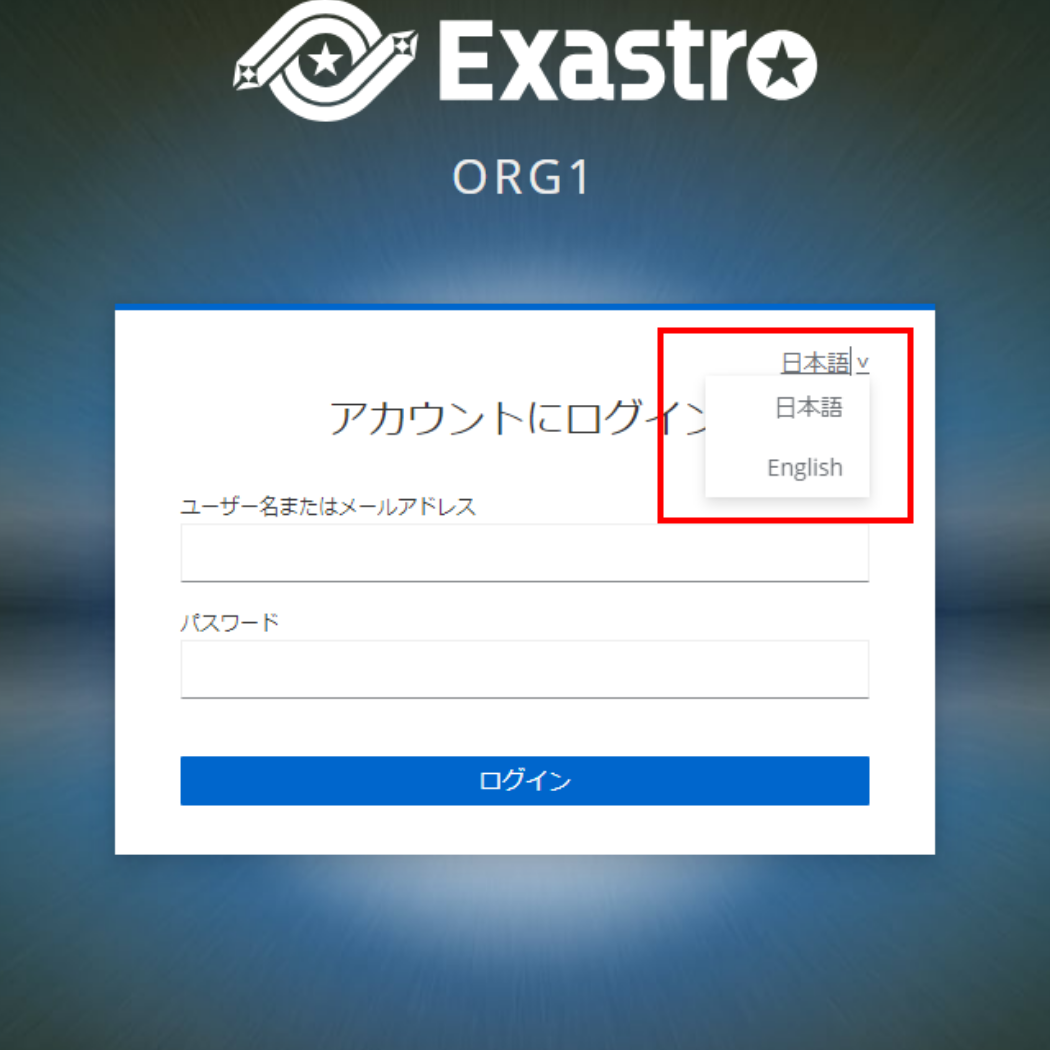
1.3. Change language
- In order to change the language, select the target language from the login page.
1.4. Account management
In the Account management page, users can edit their own account, change their password, configure two-factor authentication and issue tokens.
- Users can configure their account by selecting from the menu displayed when selecting the login user icon.
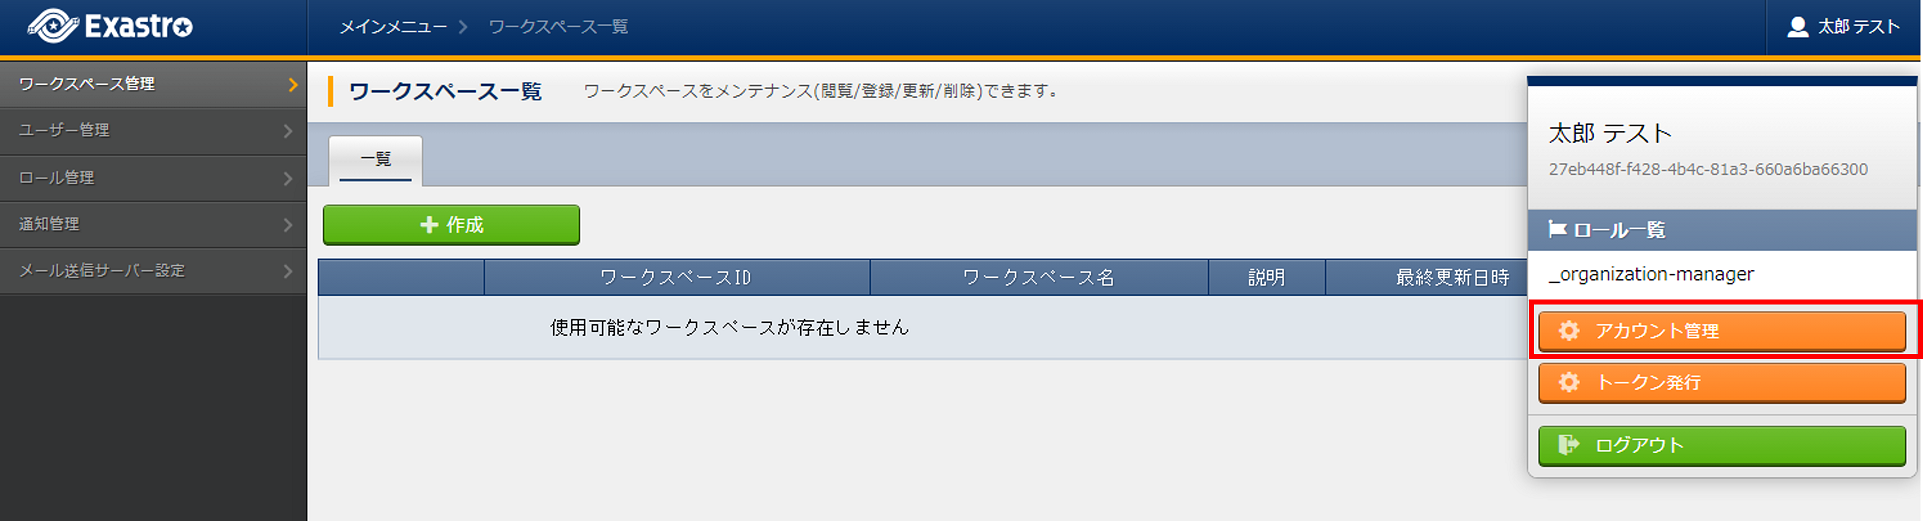
注釈
The "Menu - Account management" page will not be displayed while the user is using Exastro IT Automation.
1.4.1. Edit account
- Users can change their E-mail, first and last name, which group the belong to and the account description by in the "Edit account(Personal info) section.
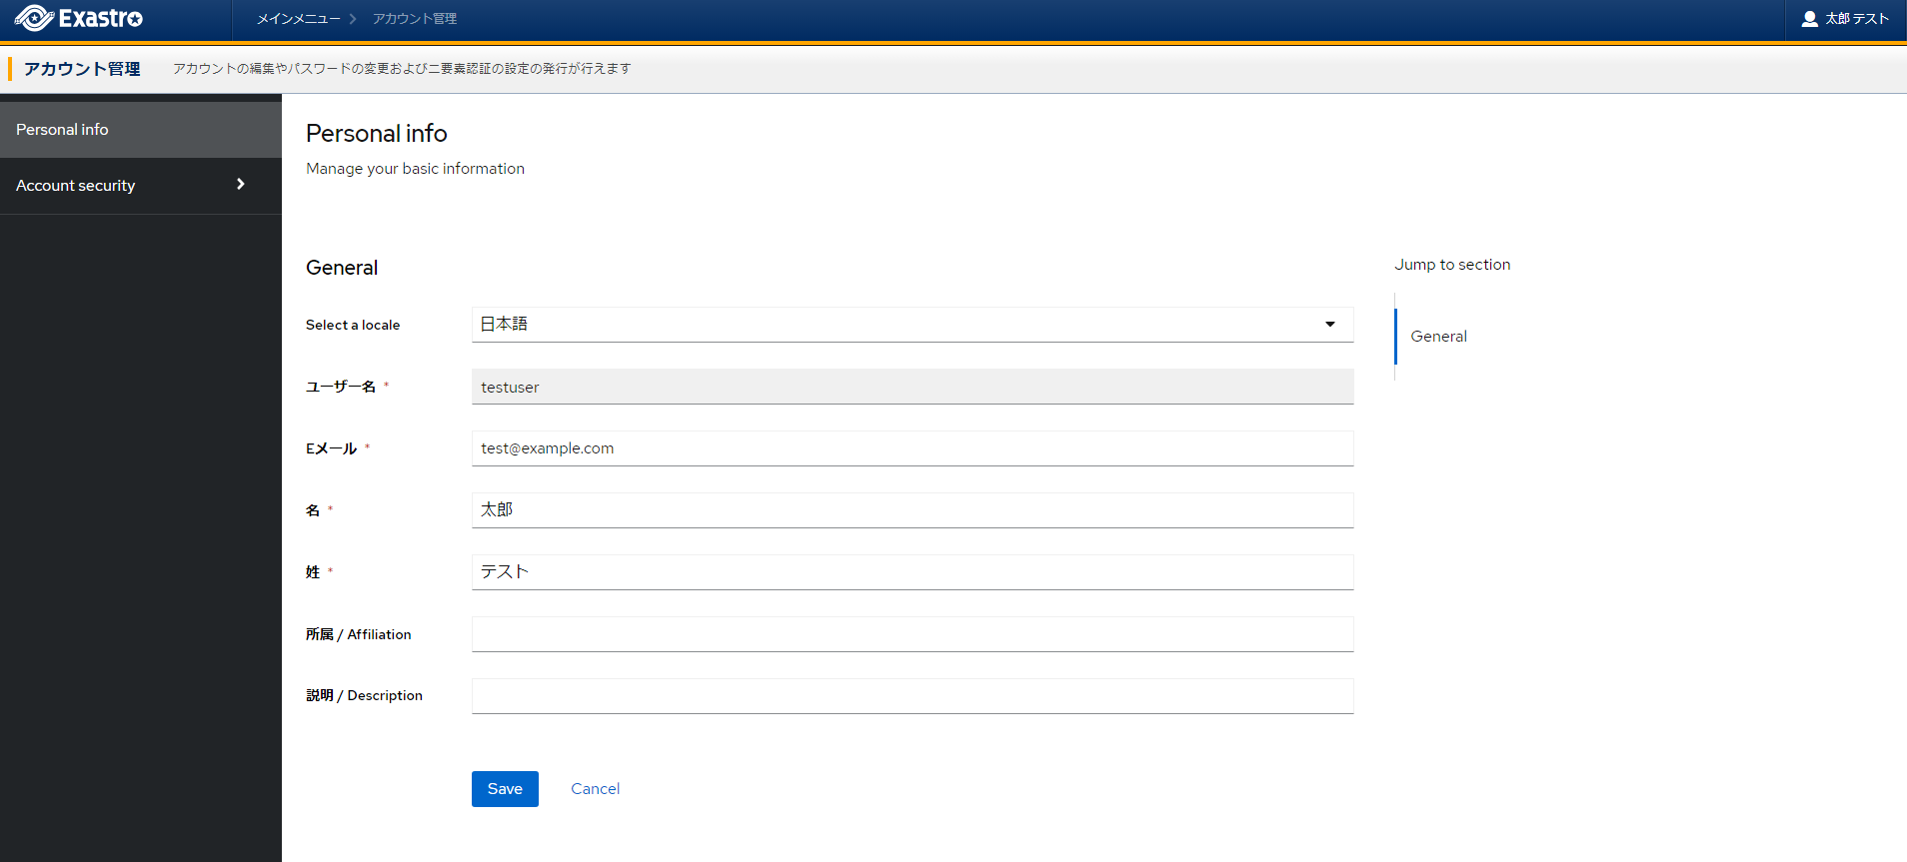
注釈
※It is not possible to change the user name
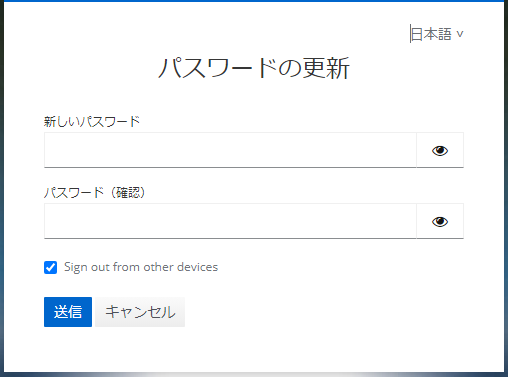
1.4.2. Change password
- From [Account security] > [Signing in] > [Basic authentication], users can display the Change password page.
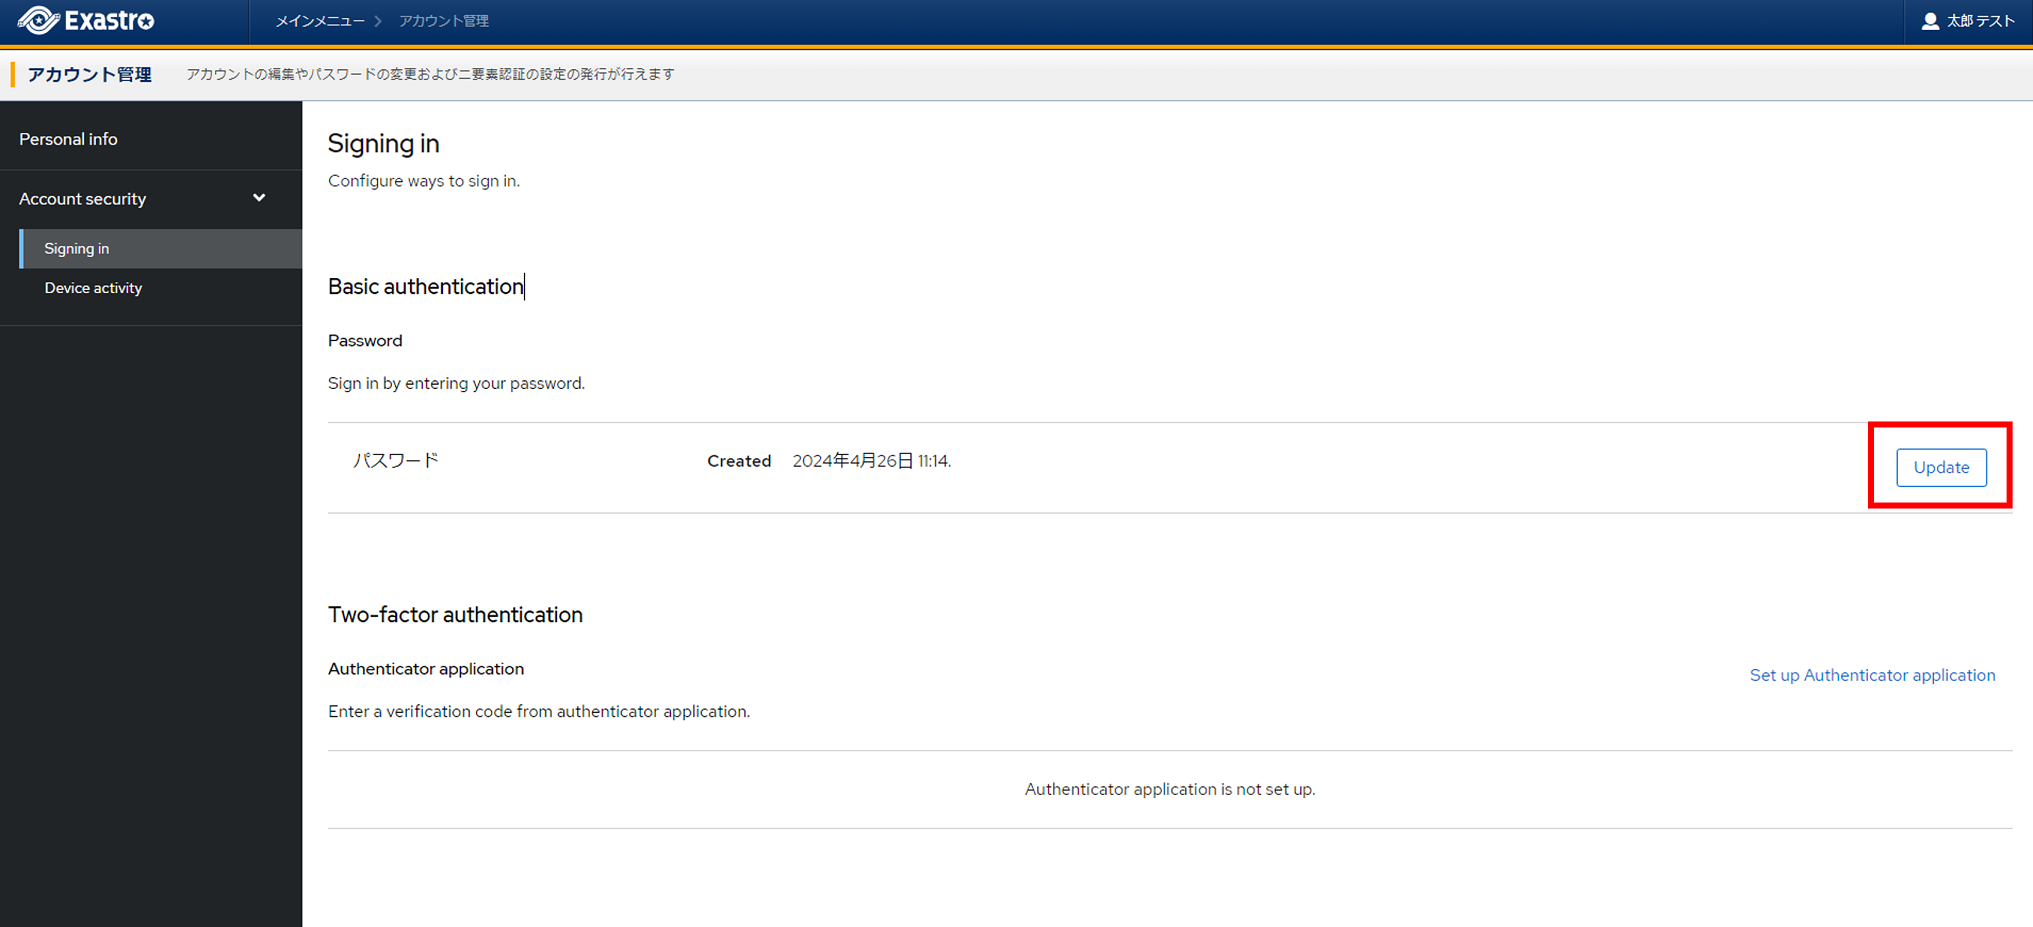
- From[Update], users can change their own passowrd.
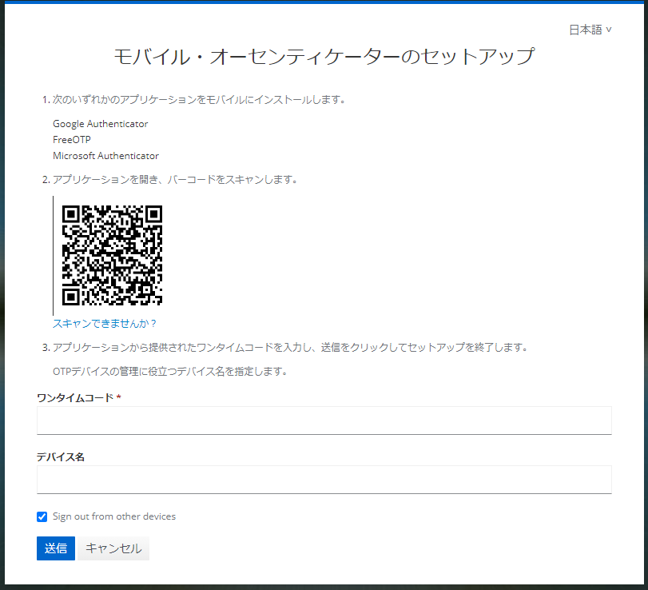
1.4.3. Configure Two-factor authentication
- Users can configure access the Two-factor authentication page from [Account security] > [Signing in] > [Two-factor authentication].

- Users input their password and login from [Set up Authenticator application] to setup Two-factor authentication.

1.5. Issue tokens
This system uses access tokens to call APIs. In order to issue an access token, the user needs a refresh token.
Tip
For more information regarding API authentication, see ../../reference/index - ../../reference/api/index - ../../reference/api/operator/index - ../../reference/api/operator/certification 、 ../../reference/api/system_manager/index - ../../reference/api/system_manager/certification.
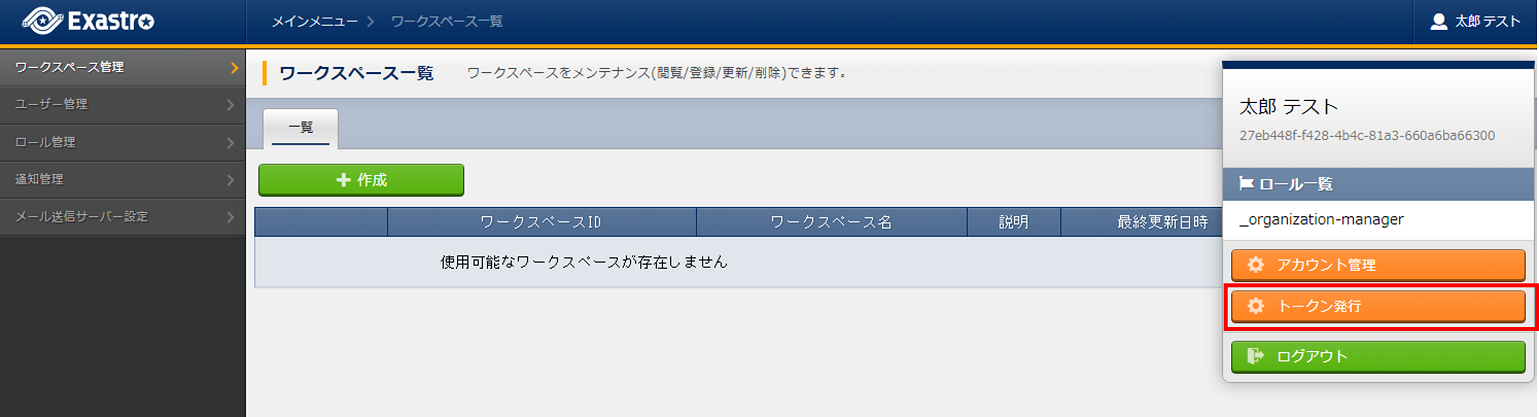
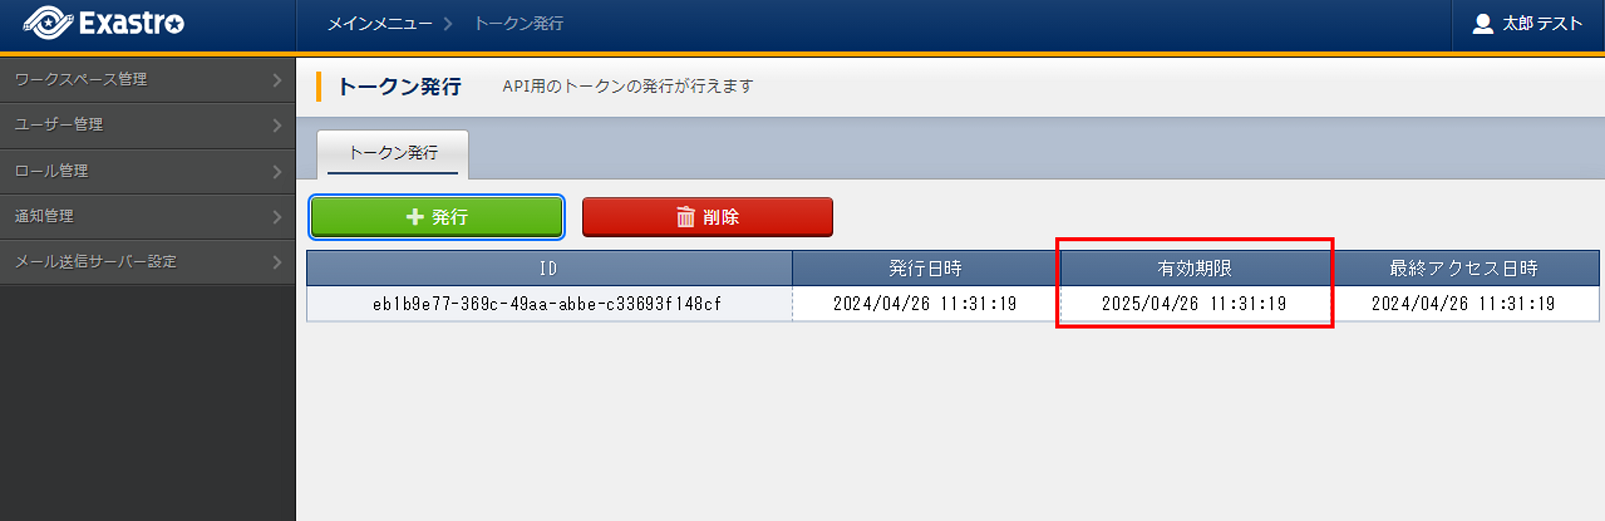
- By selecting from the menu displayed when selecting the login user icon, users can issue tokens required for API executions and display already issued tokens.
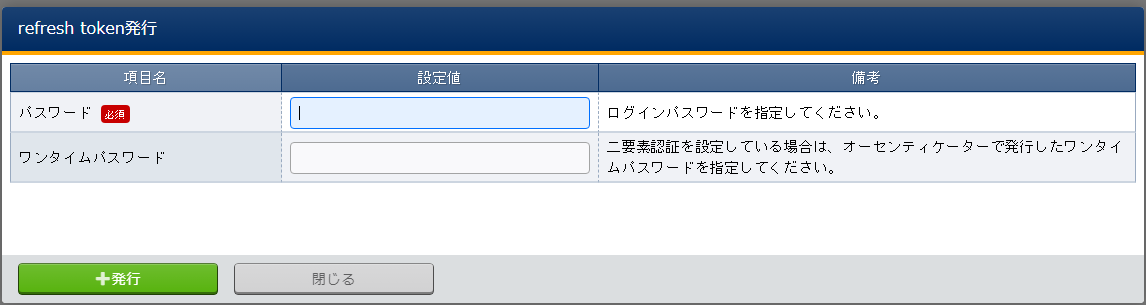
- When issuing a token for the first time, press the Issue button and input the required information to issue a token.If the user is using two-factor authentication, the user must input their one-time password from their two-factor authentication app.
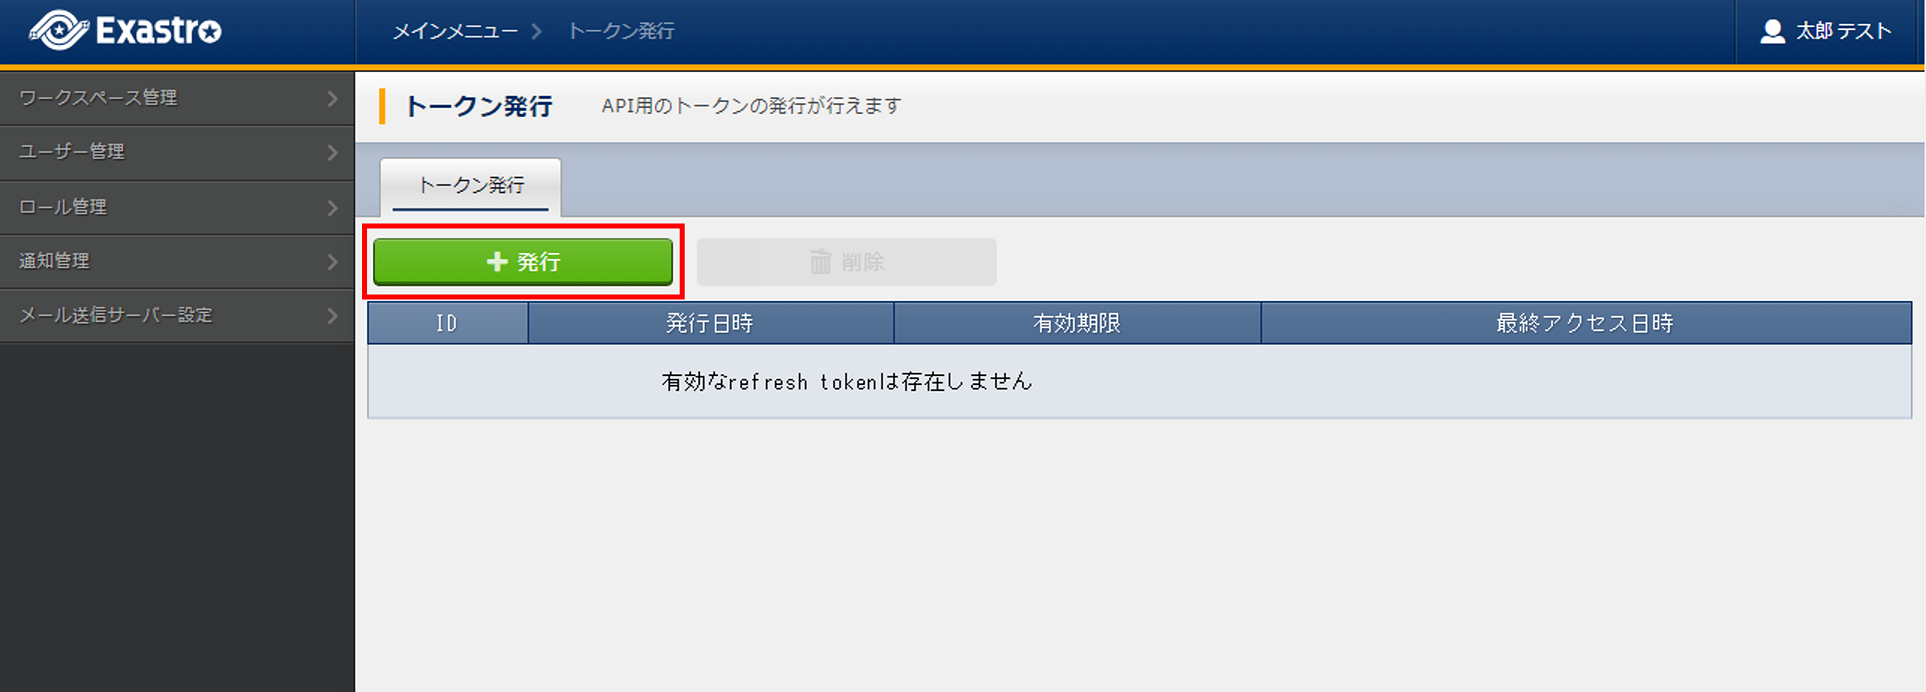
- Issued tokens cannot be re-displayed. Make sure to save the token from the issue result page.

- The tokens' expiration date can be seen in the Token list.
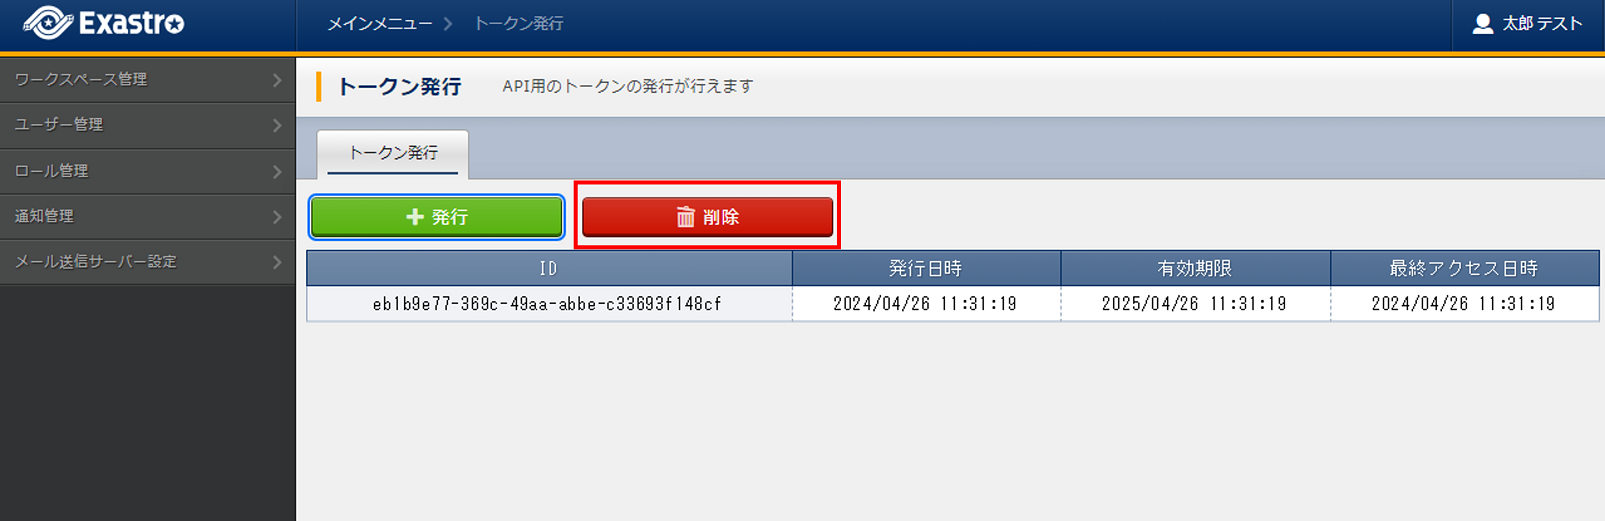
- If an issued token is no longer needed, press the Delete button to delete the token.
 The user will be asked if they really want to delete the token. If yes, input yes and press the Yes, Delete this token.
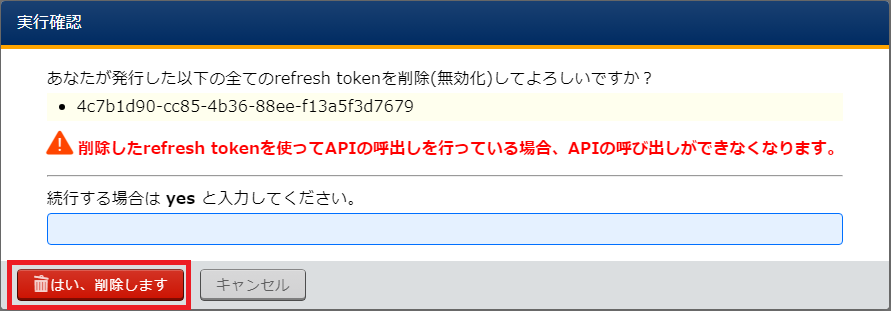
警告
When deleted, all tokens will be deactivated.