
3. Main menu (DashBoard)
3.1. Introduction
3.2. Main menu
- Page structureWidgets No.1-5 are displayed by default.Widgets No.6-9 are not displayed by default (Users can add them by pressing Edit Dashboard → Add Widget)
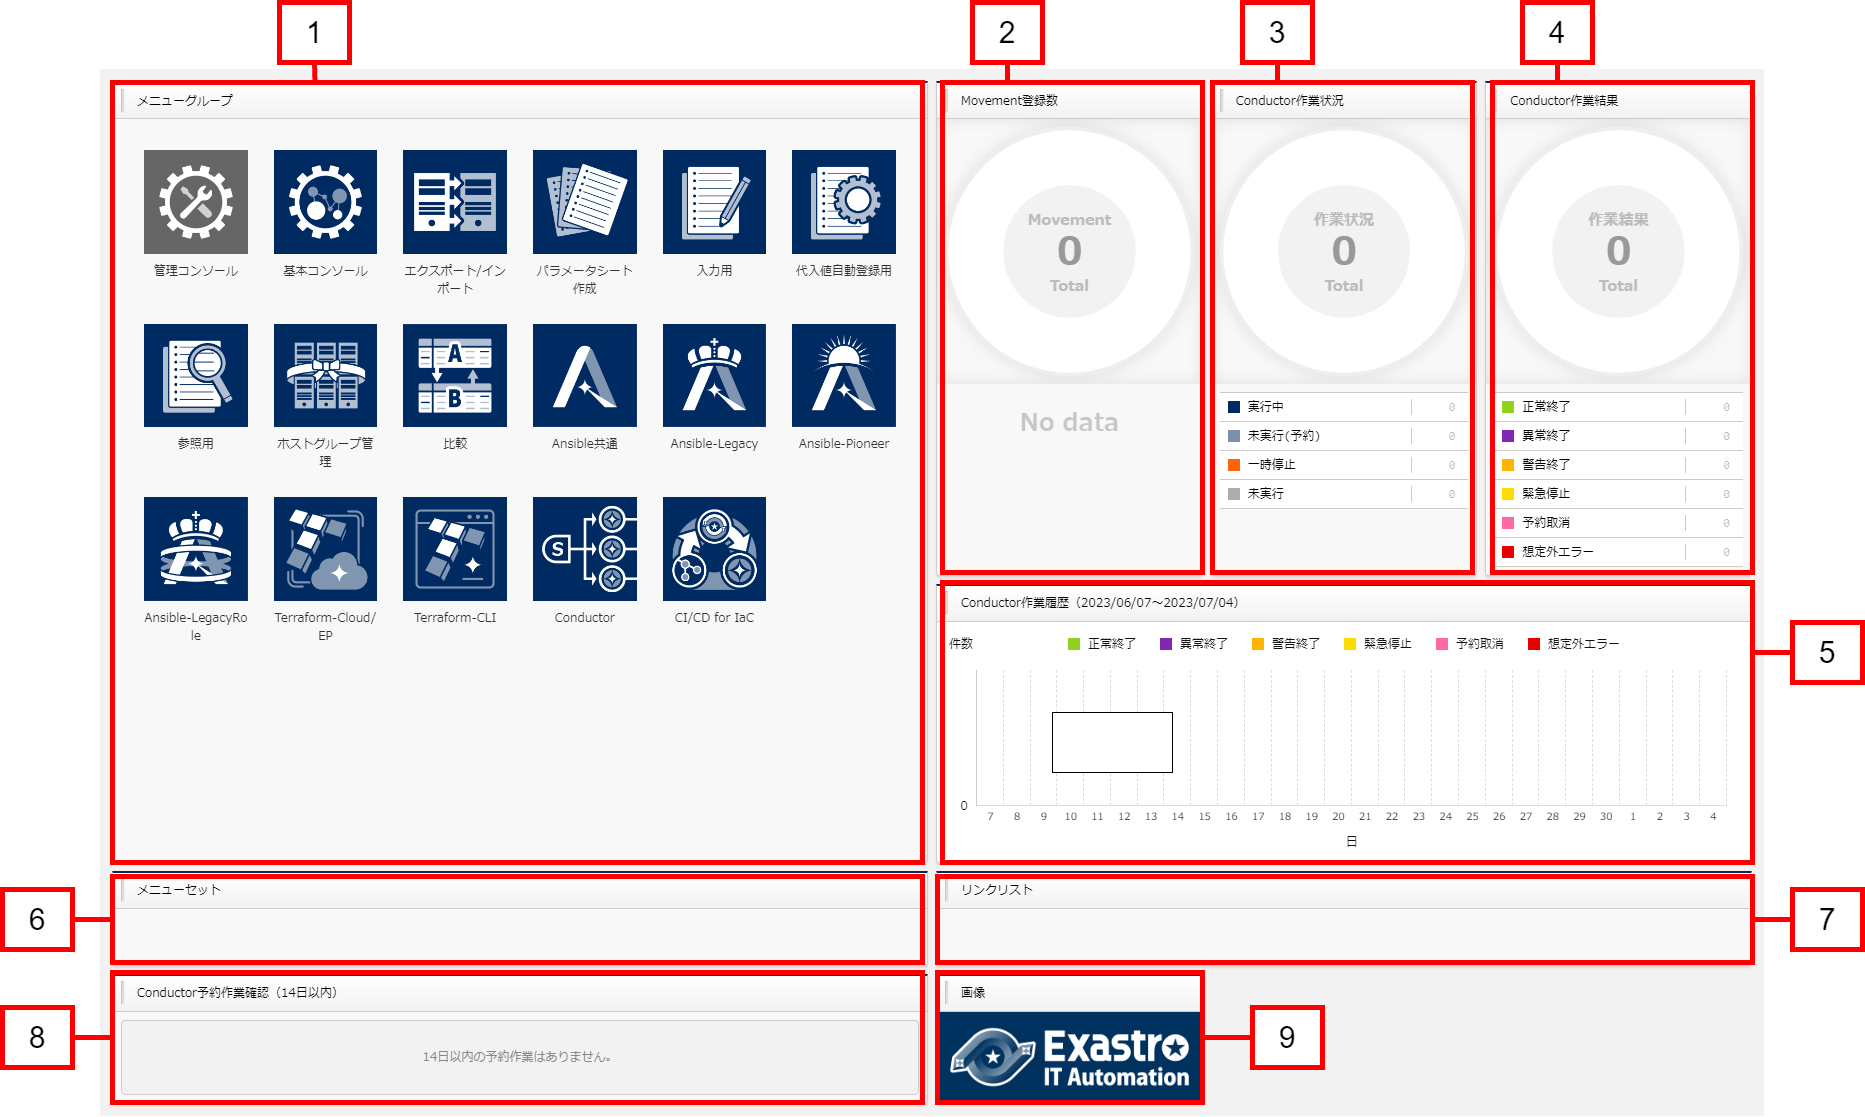
図 3.1 Widget types
No |
Widget name |
Description |
Default |
|---|---|---|---|
1 |
Menu group |
Displays a panel for each of the menu groups.
The user can move to the specified menu group's main menu by pressing the corresponding panel.
Only the installed driver panels will be displayed.
It is not possible to delete the "Menu group" widget.
|
Display |
2 |
Movement |
Displays all Movements registered to the different orchestrators in a pie graph.
Pressing either the graph or the number in the "SUM" row moves the user to the driver's "Movement list".
|
Display |
3 |
Operation status |
Displays the status of all Conductors in a pie graph.
Pressing the number in the "CON" row moves the user to the "Conductor" menu group's "Conductor operation history" menu.
|
Display |
4 |
Operation results |
Displays the Operation results of all the Conductor in a pie graph.
Pressing the number in the "CON" row moves the user to the "Conductor" menu group's "Conductor operation history" menu.
|
Display |
5 |
Operation history |
Displays the Conductors' operation history divided by dates in a bar graph.
The user can view the number of items and detailed information by overing the cursor over the bar graph.
Pressing the number in the "CON" row moves the user to the "Conductor" menu group's "Conductor operation history" menu.
|
Display |
6 |
Menu set |
Allows the user to create a set of menu groups. |
Hidden |
7 |
Link |
Allows the user to create a list of links. |
Hidden |
8 |
Reserved operation confirmation |
Displays all conductors with the "Not executed (reserved)" status in a list.
This widget allows users to check the Instance ID, Conductor name, Operation name, Reservation time/date and the remaining time until the reserved date/time.
pressing the Instance ID moves the user to the target operation confirmation page.
|
Hidden |
9 |
Picture |
Allows users to display pictures. |
Hidden |
3.3. Edit/Operate Dashboard
3.3.1. Edit DashBoard
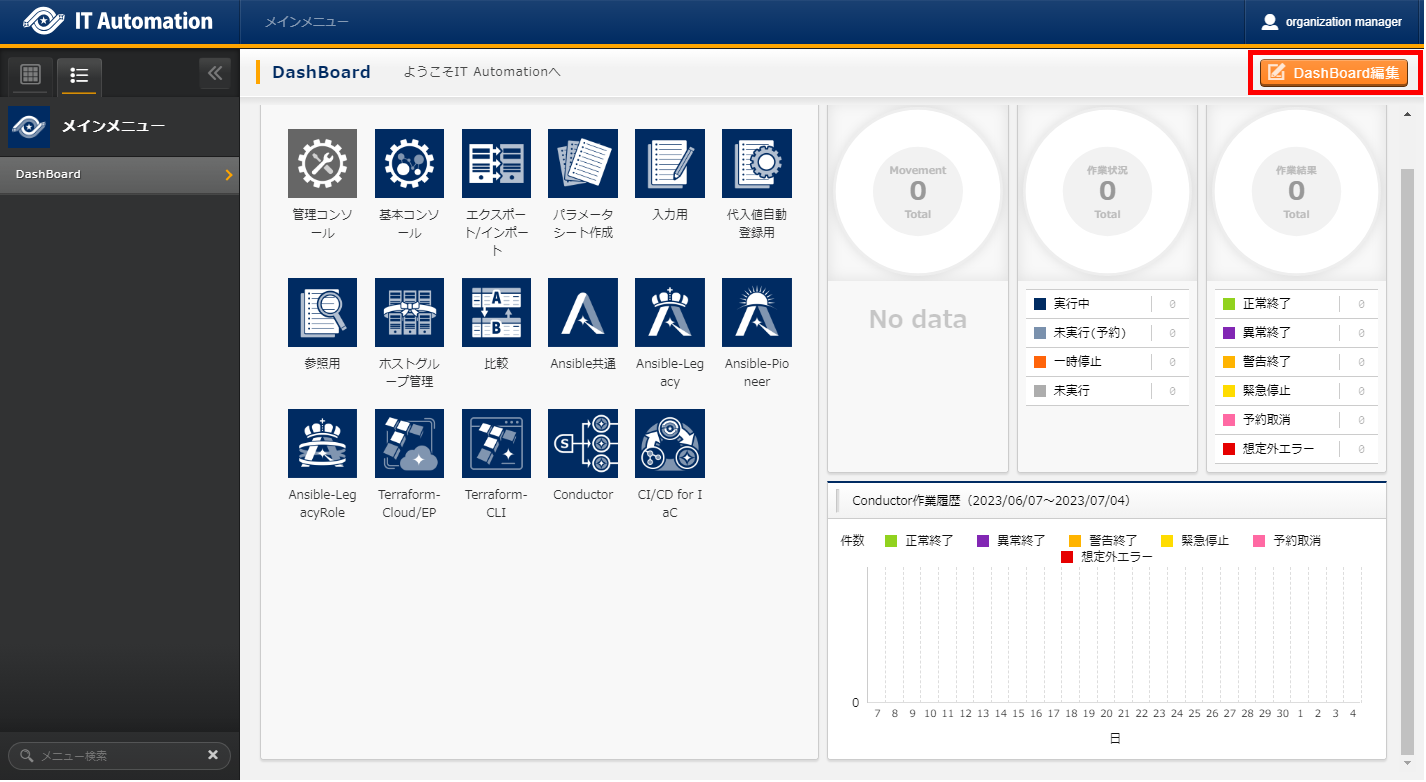
図 3.2 DashBoard edit button
- Add WidgetSee "Add Widget".
- Edit, Delete WidgetSee "Edit, delete Widget".
- Confirm editPress the Confirm edit button to save the edited widget contents.
- ResetPress the Reset button to reset the edited widget contents. This will return the widget to the default state.
- Delete editPress the Delete edit button to delete the edited contents. This will return the widget to before the contents were edited.
3.3.1.1. Add Widget
- Select Add Widget to display the widget selection.Select the desired widget and press Apply to add the widget.
図 3.3 Adding Widget
Tip
図 3.4 Add, Delete Blank
Tip
図 3.5 Add Menu set panel
3.3.1.2. Edit, delete Widget
- :Displays the Edit widget page.See the following for more information regarding editing the different widgets.
- :Deletes the Widget.
図 3.6 Edit, delete Widget
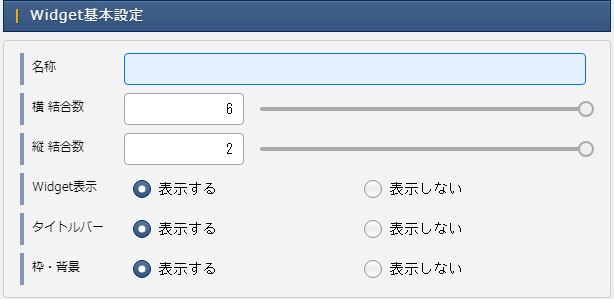
図 3.7 Shared widget settings
No |
Item name |
Description |
Input item |
|---|---|---|---|
1 |
Name |
Changes the name of the widget. |
Manual |
2 |
Horizontal combined number |
Changes the combined number horizontally. |
Manual
Select with slider
|
3 |
Vertical combined number |
Changes the combined number vertically |
Manual
Select with slider
|
4 |
Widget display |
Changes whether to hide or display the frame/background. |
Select
・Display
・Hide
|
5 |
Title bar |
Changes whether to hide or display the frame/background. |
Select
・Display
・Hide
|
6 |
Frame/Background |
Changes whether to hide or display the frame/background. |
Select
・Display
・Hide
|
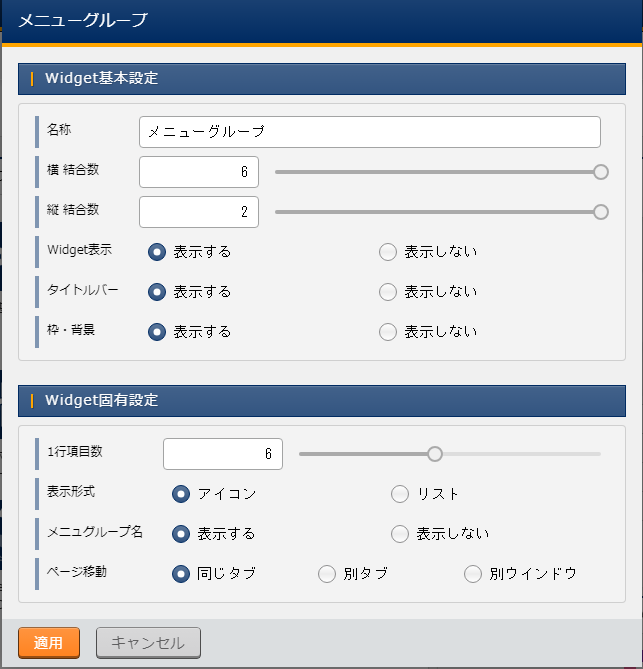
図 3.8 Widget individual settings(Menu group)
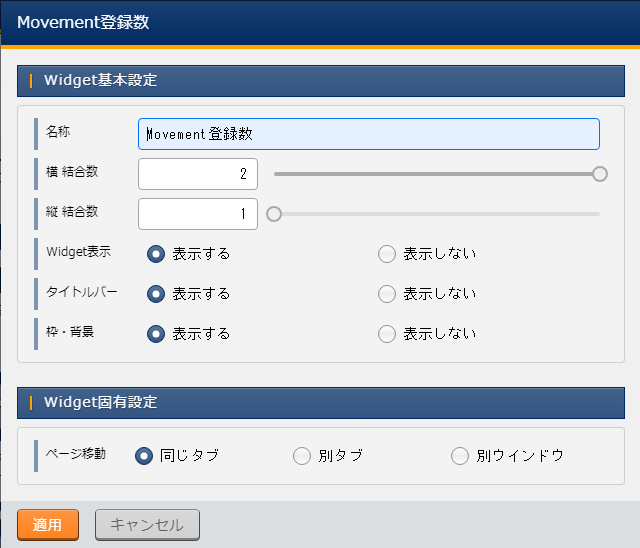
図 3.9 Widget individual settings(Movement registration number)
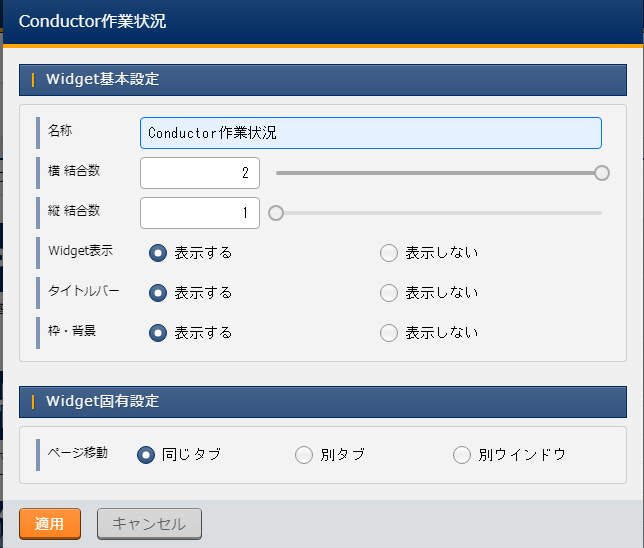
図 3.10 Widget individual settings(Conductor operation status)

図 3.11 Widget individual settings(Conductor operation results)
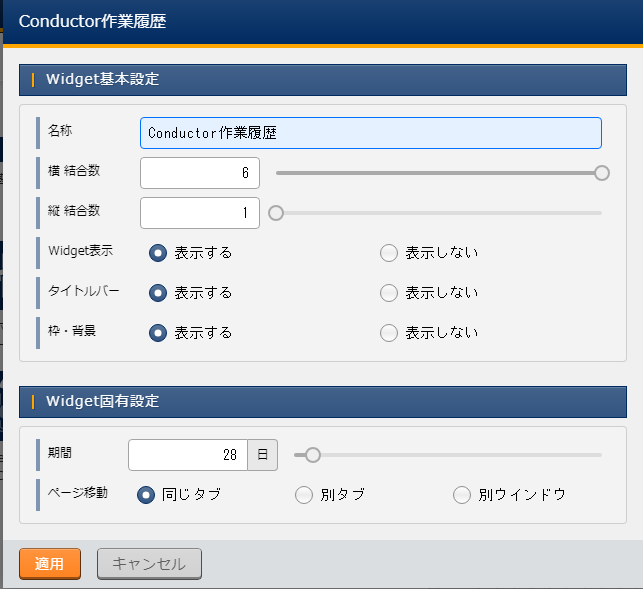
図 3.12 Widget individual settings(Conductor operation history)
図 3.13 Widget individual settings(Menu set)
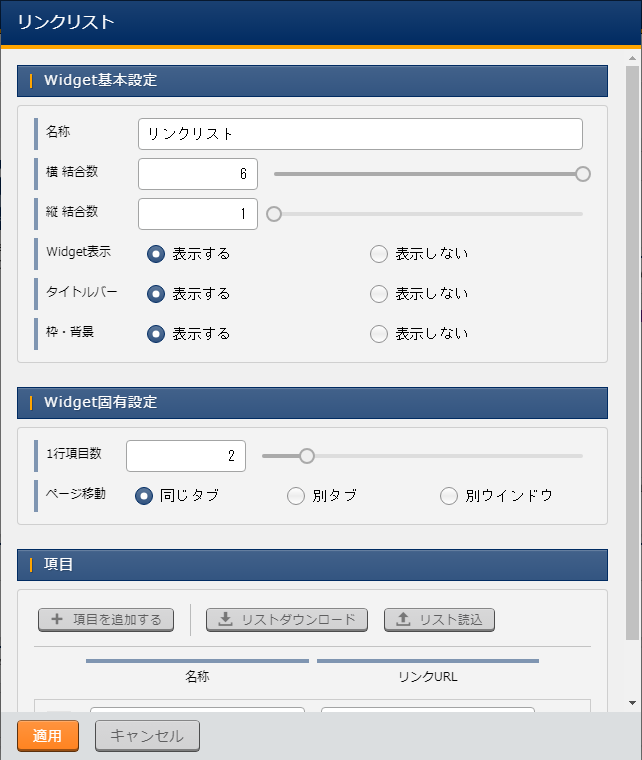
図 3.14 Widget individual settings(Link list)
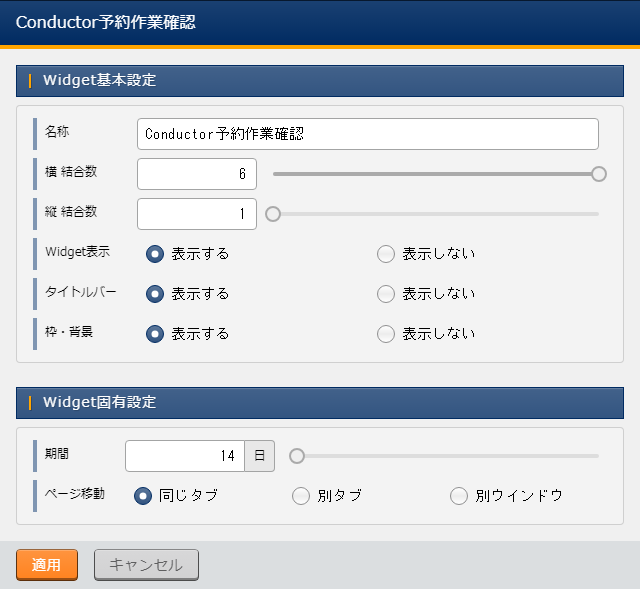
図 3.15 Widget individual settings(Conductor reserved operation confirmation)
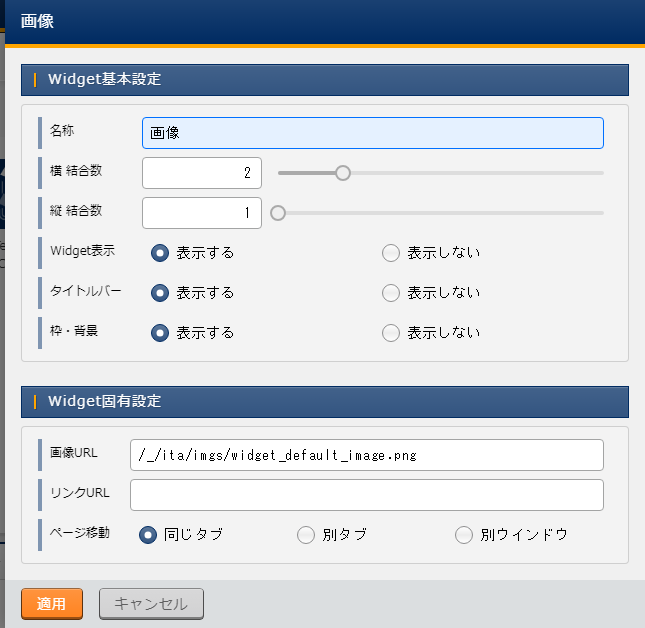
図 3.16 Widget individual settings(Picture)