
3. Resource plans
3.1. Introduction
3.2. Resource plan
Organization |
Resource plan |
Workspace number |
User number |
Role number |
|---|---|---|---|---|
org1 |
Standard plan |
Max 20 |
Max 30 |
Max 30 |
org2 |
Premium plan |
Max 50 |
Max 100 |
Max 100 |
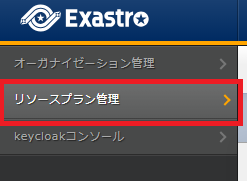
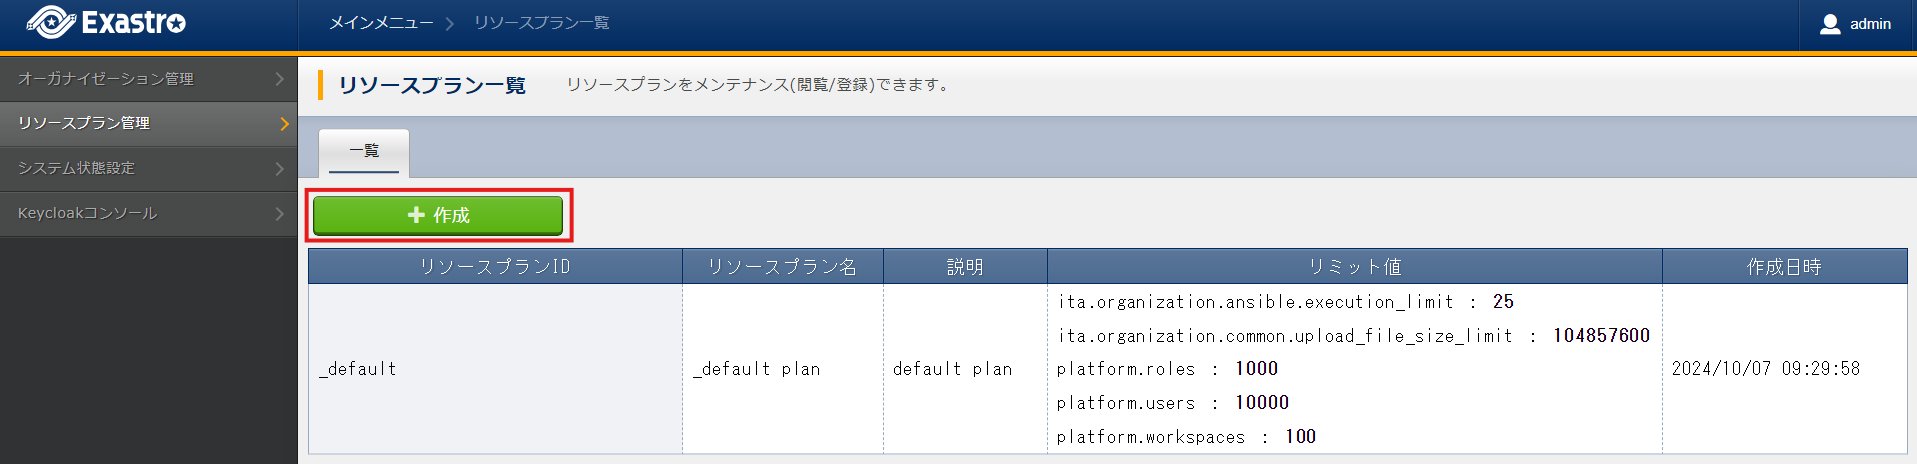
3.2.1. Configuring resource plans
3.2.2. System behaviour
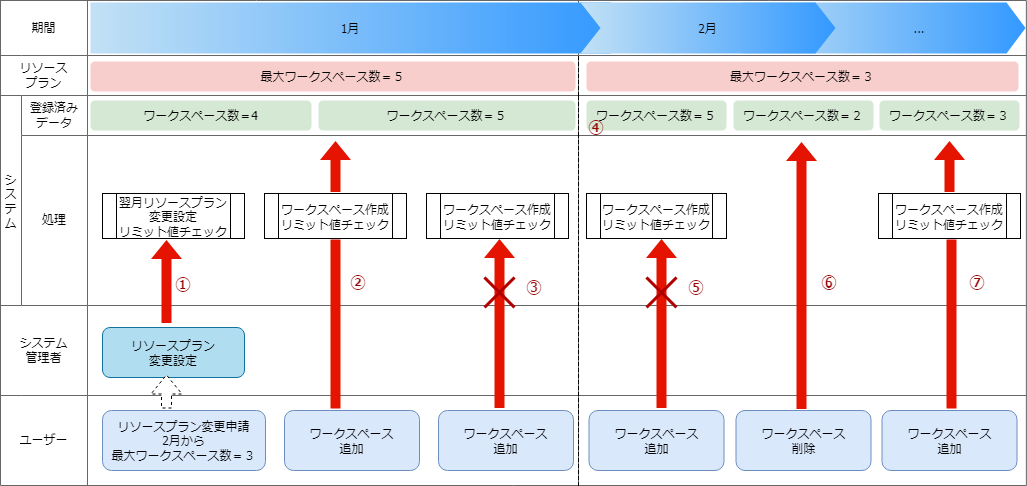
- If a user asks to change the max amount to workspaces to 3, the system administrator will get a warning that the value will exceed the limit from February since the registered data says "Workspace number =4"
- Since the registered data says "Workspace number = 4", the user will be able to add workspaces without exceeding the resource plan limit ("Workspace number =5").
- Since the registered data says "Workspace number = 5", the user will not be able to add more workspaces since the Maximum Workspace number =5 (an error will occur).
- The amount of workspaces will exceed the Maximum workspace number (3), but it will not restrict the user from using the system
- Since the registered data says "Workspace number = 5",the user will not be able to add workspaces exceeding the resource plan's Maximum workspace number (3) (an error will occur).
- Users can delete workspaces so the registered data changes from "Workspace number = 5" to "Workspace number = 2".
- Since the Registered data says "Workspace number = 2", the user can create a new workspace since the resource plan's maximum workspace number is 3.
3.3. Configure Resource plan
3.3.1. Pre-requisites
Operation client required applications
curl
git
jq
注釈
These commands are not required the user is creating resource plans from the webUI.
3.3.2. Preparation
- Fetch the Organization creation shell script from the repository using git clone.
# Acquire Exastro Platform files
git clone https://github.com/exastro-suite/exastro-platform.git
- Move the fetched files to the tools folder and change the API execution destination URL within the Organization creation shell script to the System administrator's site address.
vi api-auth.confChangesapi-auth.conf
CONF_BASE_URL={Site address for System admin}
CURL_OPT=-svk
Tip
If the user is using a self-signed certificate, a certificate error will occur.Changing the CURL_OPT=-sv within the setting file to CURL_OPT=-svk prevents the error from occuring, but it is recommended that the user installs a valid certificate.
注釈
These commands are not required the user is creating resource plans from the webUI.
3.3.3. Resource plan configuration
※For more information regarding applying resource plans, see Creating/Editing Organizations.
3.3.4. Confirming current resource plan items
Follow the steps below
- Confirm Resource plan setting itemsConfirm the resource types (ID) that can be specified when creating resource plans.
- Command
./get-plan-item-list.sh
- Input information after executing command (input example)
your username : System administrator's username
your password : System administrator's password
- Results when process succeeds"result": "000-00000" means that the process succeeded
< HTTP/1.1 200 OK
< Date: Fri, 09 Dec 2022 06:58:26 GMT
< Server: Apache/2.4.37 (Red Hat Enterprise Linux) mod_wsgi/4.7.1 Python/3.9
< Content-Length: 451
< Content-Type: application/json
<
{ [451 bytes data]
* Connection #0 to host platform-auth left intact
{
  "data": [
    {
      "id": "ita.organization.ansible.execution_limit",
      "informations": {
        "default": 25,
        "description": "Maximum number of movement executions for organization default",
        "max": 1000
      }
    },
    {
      "id": "ita.organization.common.upload_file_size_limit",
      "informations": {
        "default": 104857600,
        "description": "Maximum byte size of upload file for organization default",
        "max": 107374182400
      }
    },
    {
      "id": "platform.roles",
      "informations": {
        "default": 1000,
        "description": "Maximum number of roles for organization default",
        "max": 1000
      }
    },
    {
      "id": "platform.users",
      "informations": {
        "default": 10000,
        "description": "Maximum number of users for organization default",
        "max": 10000
      }
    },
    {
      "id": "platform.workspaces",
      "informations": {
        "default": 100,
        "description": "Maximum number of workspaces for organization default",
        "max": 1000
      }
    }
  ],
  "message": "SUCCESS",
  "result": "000-00000",
  "ts": "2022-12-09T06:58:26.764Z"
}
Follow the steps below.
- If directly calling RestAPI, the following contents can be called.
BASE64_BASIC=$(echo -n "Configure System admin user name:Configure system admin password" | base64)
BASE_URL=Configure system admin site address.

curl -k -X GET \
    -H "Content-Type: application/json" \
    -H "Authorization: basic ${BASE64_BASIC}" \
    -d  @- \
    "${BASE_URL}/api/platform/plan_items"
3.3.5. Register resource plan
- Register resource plan
- Configure json file for the resource planCopy and use the add-plan.sample.json under the fetched tools folder.
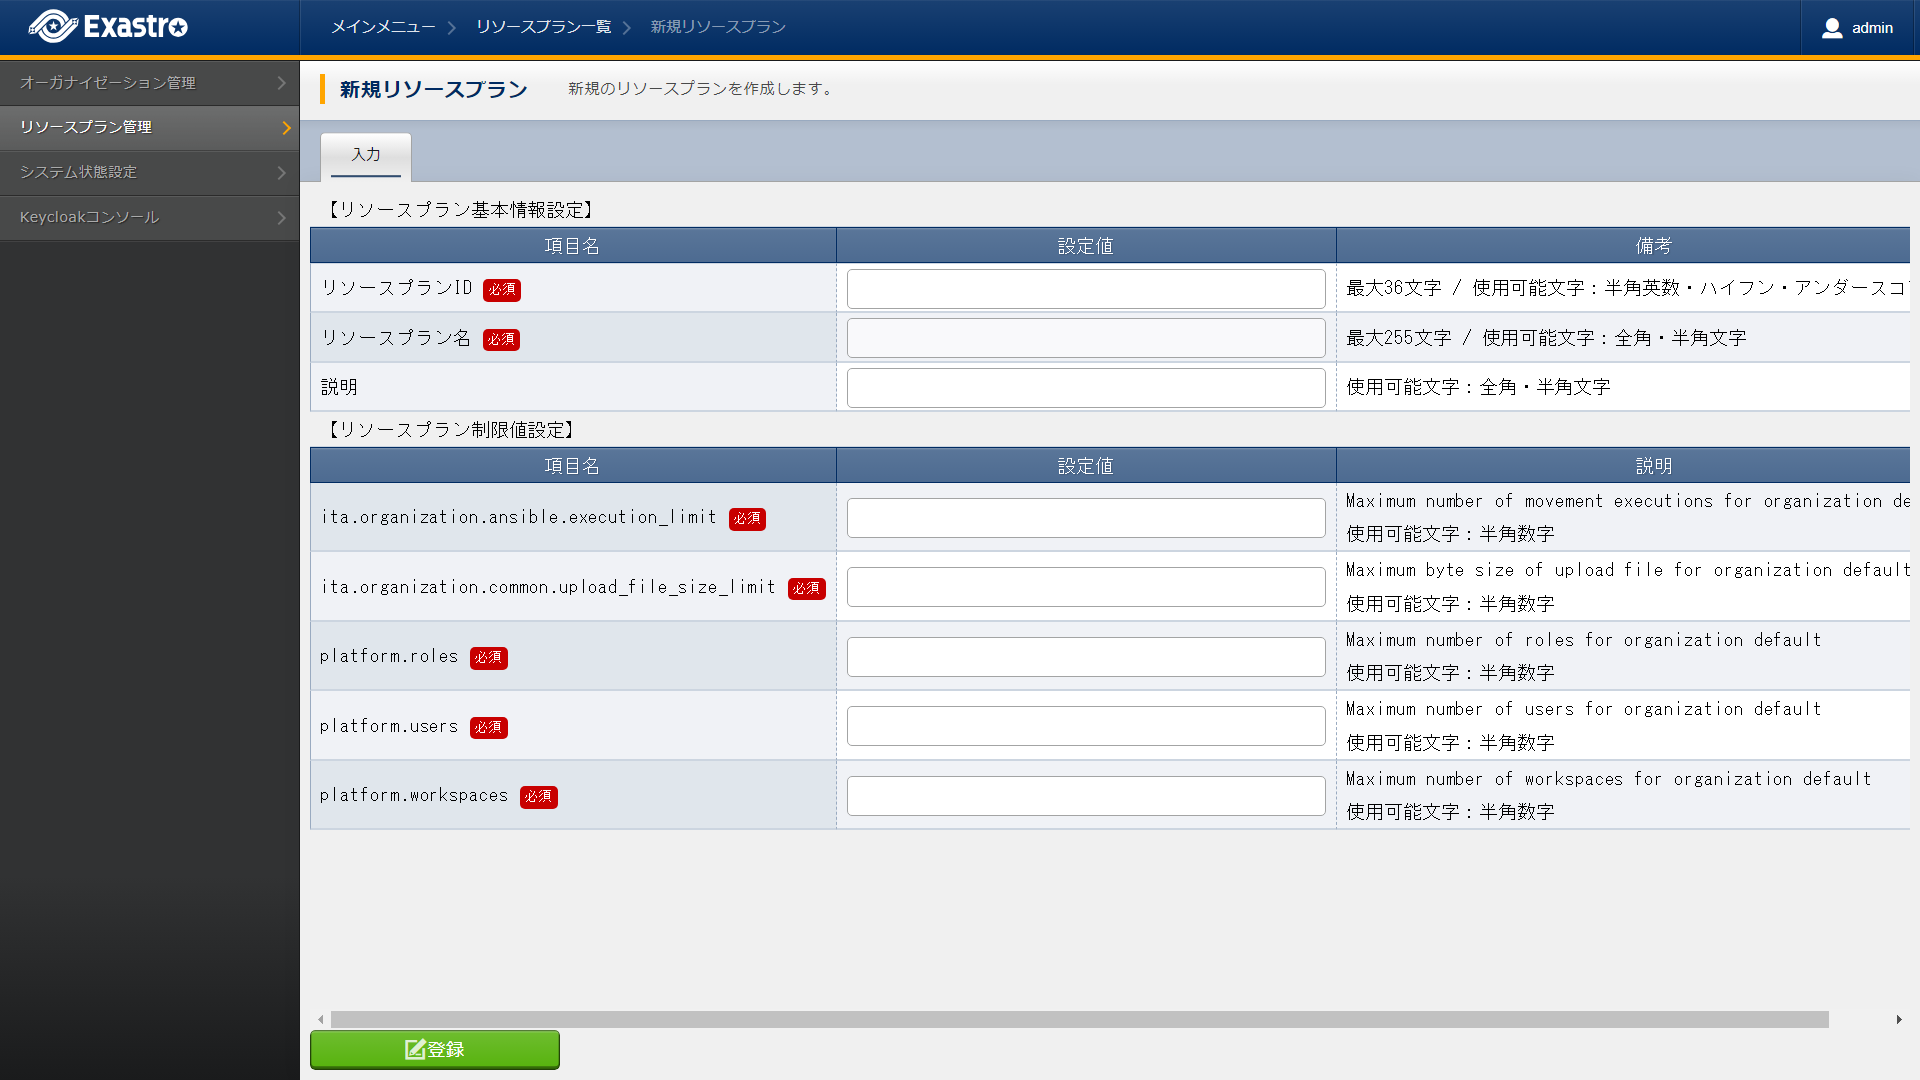
表 3.9 Item description¶ Item name
Description
Resource plan ID
Specify an unique ID for the resource plan.This ID is used to link the resource plan to Organizations.Resource plan name
Specify a name for the resource plan.Decription
Write a description for the resource plan.Resource plan limit value settings
Specify limit for the organization resources.The maximum and default values for the different items are as following.ita.organization.ansible.execution_limit:【Max:1000】【Default:25】ita.organization.common.upload_file_size_limit:【Max:107374182400】【Default:104857600】platform.roles:【Max:1000】【Default:1000】platform.users:【Max:10000】【Default:10000】platform.workspaces:【Max:1000】【Default:100】
Follow the steps below.
- Configure resource plan
- Configure json file for the resource planCopy and use the add-plan.sample.json under the fetched tools folder.
- Register resource planadd-plan.json copy example
vi add-plan.json{ "id": "plan-standard", "name": "Standard plan", "informations": { "description": "" }, "limits": { "ita.organization.ansible.execution_limit": 25, "ita.organization.common.upload_file_size_limit": 104857600, "platform.workspaces": 500, "platform.users": 1000, "platform.roles": 500 } }
Tip
※"limits" are created based on the contents fetched in the Resource plan setting item confirmation - Item description
表 3.10 Resource plan setting items¶ Item
Contents
Format
id
Resource plan ID
Can contain half-width alphanumeric cahracters, numbers, hypen and underscore (Max 36 letters)※The ID must start with an uncapitalized alphanumeric letter※The ID cannot match reserved phrases (More information further down).name
Resource plan name
Max 255 letters
informations.description
Description
Max 255 letters
limits.xxxxxx.xxxxx
Configure the contents of the fetched resource plan items
Numeric value
- Command
./add-plan.sh add-plan.json - Input information after executing command (input example)
your username : Input the System admin's username
your password : Input the System admin's password
- Results when process succeeds"result": "000-00000" means that the process succeeded
< HTTP/1.1 200 OK
< Date: Fri, 09 Dec 2022 08:12:35 GMT
< Server: Apache/2.4.37 (Red Hat Enterprise Linux) mod_wsgi/4.7.1 Python/3.9
< Content-Length: 104
< Content-Type: application/json
<
{ [104 bytes data]
* Connection #0 to host platform-auth left intact
{
"data": null,
"message": "SUCCESS",
"result": "000-00000",
"ts": "2022-12-09T08:12:36.219Z"
}
- Results when process fails
< HTTP/1.1 400 BAD REQUEST
< Date: Fri, 09 Dec 2022 08:16:09 GMT
< Server: Apache/2.4.37 (Red Hat Enterprise Linux) mod_wsgi/4.7.1 Python/3.9
< Content-Length: 265
< Connection: close
< Content-Type: application/json
<
{ [265 bytes data]
* Closing connection 0
{
  "data": null,
  "message": "Could not create because the specified plan already exists",
  "result": "400-27001",
  "ts": "2022-12-09T08:16:09.830Z"
}
Follow the steps below.
- If directly calling RestAPI, the following contents can be called.
BASE64_BASIC=$(echo -n "Configure System admin user name:Configure system admin password" | base64)
BASE_URL=Configure system admin site address.

curl -k -X POST \
    -H "Content-Type: application/json" \
    -H "Authorization: basic ${BASE64_BASIC}" \
    -d  @- \
    "${BASE_URL}/api/platform/plans" \
    << EOF
{
  "id": "plan-standard",
  "name": "Standard plan",
  "informations": {
    "description": ""
  },
  "limits": {
    "ita.organization.ansible.execution_limit": 25,
    "platform.workspaces": 500,
    "platform.users": 1000,
    "platform.roles": 500
  }
}
EOF
注釈
ita.organization.ansible.execution_limit
注釈
ita.organization.common.upload_file_size_limit
3.3.6. Confirm resource plan
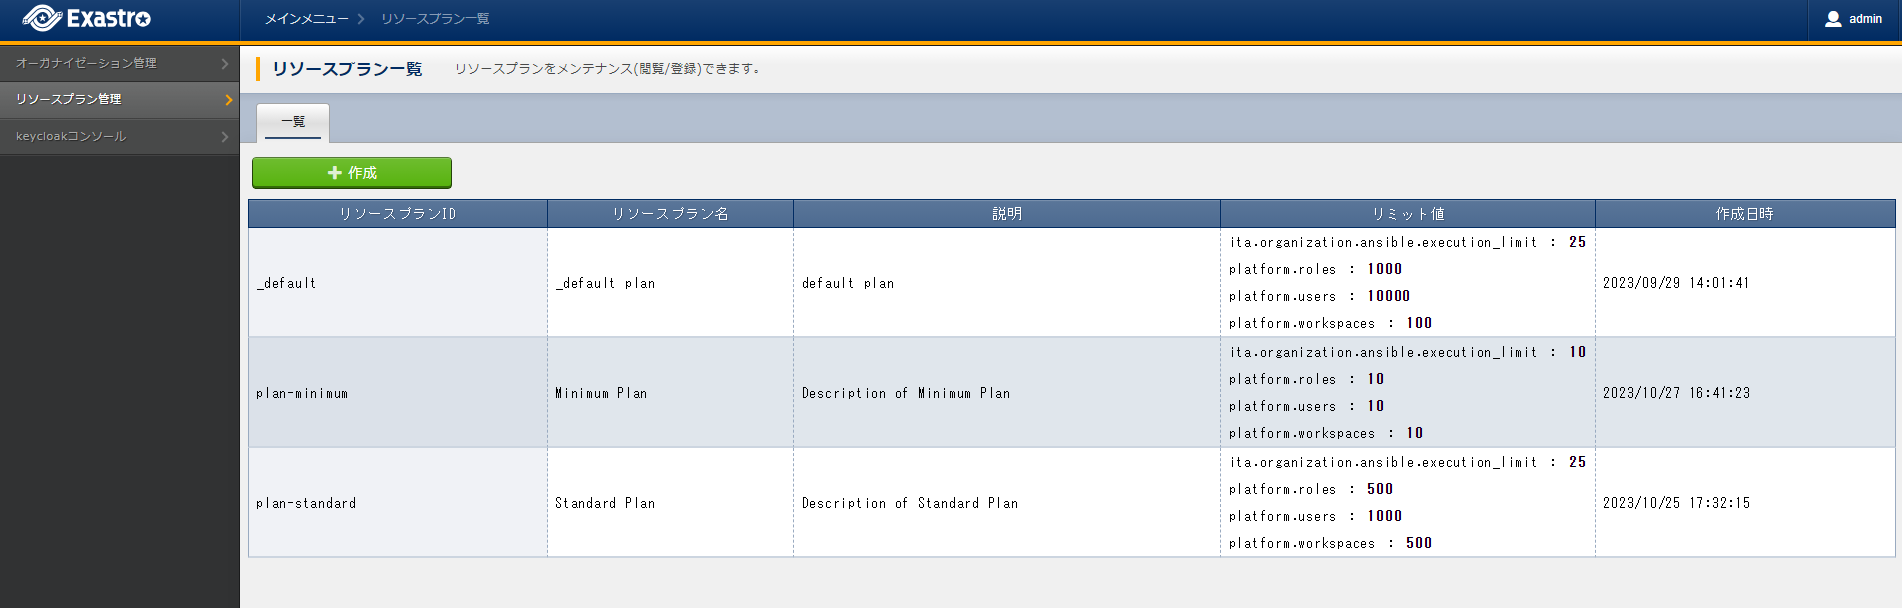
Follow the steps below.
- Check configured resource plans
- Command
./get-plan-list.sh
- Input information after executing command (input example)
your username : Input the System admin's username
your password : Input the System admin's password
- Results when process succeeds"result": "000-00000" means that the process succeeded
< HTTP/1.1 200 OK
< Date: Thu, 12 Jan 2023 08:26:42 GMT
< Server: Apache/2.4.37 (Red Hat Enterprise Linux) mod_wsgi/4.7.1 Python/3.9
< Content-Length: 4274
< Content-Type: application/json
<
{ [4274 bytes data]
* Connection #0 to host platform-auth left intact
{
  "data": [
    {
      "create_timestamp": "2022-12-07T06:04:31.000Z",
      "create_user": "system",
      "id": "_default",
      "informations": {
        "description": "default plan"
      },
      "last_update_timestamp": "2022-12-07T06:04:31.000Z",
      "last_update_user": "system",
      "limits": {
        "ita.organization.ansible.execution_limit": 25,
        "platform.workspaces": 100,
        "platform.roles": 1000,
        "platform.users": 10000
      },
      "name": "_default plan"
    },
    {
      "create_timestamp": "2022-12-09T08:12:36.000Z",
      "create_user": "bd09d674-298f-4b55-9777-0758bf6f294e",
      "id": "plan-standard",
      "informations": {
        "description": ""
      },
      "last_update_timestamp": "2022-12-09T08:12:36.000Z",
      "last_update_user": "bd09d674-298f-4b55-9777-0758bf6f294e",
      "limits": {
        "ita.organization.ansible.execution_limit": 25,
        "platform.workspaces": 500,
        "platform.users": 1000,
        "platform.roles": 500
      },
      "name": "Standard plan"
    }
  ],
  "message": "SUCCESS",
  "result": "000-00000",
  "ts": "2023-01-12T08:26:42.375Z"
}
Follow the steps below.
- If directly calling RestAPI, the following contents can be called.
BASE64_BASIC=$(echo -n "Configure System admin user name:Configure system admin password" | base64)
BASE_URL=Configure system admin site address.

curl -k -X GET \
    -H "Content-Type: application/json" \
    -H "Authorization: basic ${BASE64_BASIC}" \
    -d  @- \
    "${BASE_URL}/api/platform/plans"
Tip
注釈
3.3.7. Confirm use status
Tip
Follow the steps below.
- Check usage status per organization
- Command
./get-usage-list.sh
- Input information after executing command (input example)
organization id : Input the ID of the organization that will be fetched (If left blank, all organizations will be specified)

your username : Input the System admin's username
your password : Input the System admin's password
- Results when process succeeds"result": "000-00000" means that the process succeeded
< HTTP/1.1 200 OK
< Date: Mon, 30 Jan 2023 08:18:57 GMT
< Server: Apache/2.4.37 (Red Hat Enterprise Linux) mod_wsgi/4.7.1 Python/3.9
< Content-Length: 432
< Content-Type: application/json
<
{ [432 bytes data]
* Connection #0 to host platform-auth left intact
{
  "data": [
    {
      "organization_id": "org1",
      "usages": [
        {
          "current_value": 0,
          "id": "platform.workspaces"
        },
        {
          "current_value": 1,
          "id": "platform.users"
        },
        {
          "current_value": 0,
          "id": "platform.roles"
        }
      ]
    }
  ],
  "message": "SUCCESS",
  "result": "000-00000",
  "ts": "2023-01-30T08:18:57.887Z"
}
Follow the steps below.
- If directly calling RestAPI, the following contents can be called.
BASE64_BASIC=$(echo -n "Configure System admin user name:Configure system admin password" | base64)
BASE_URL=Configure system admin site address.
ORG_ID=Input the ID of the organization that will be fetched.

curl -k -X GET \
    -H "Content-Type: application/json" \
    -H "Authorization: basic ${BASE64_BASIC}" \
    "${BASE_URL}/api/platform/usages?organization_id=${ORG_ID}"
注釈
In order to check the usage status for all organizations, do not specify "?organization_id=${ORG_ID}" and execute.